Saturday, September 21, 2013

Recipe: Yogurt and QT's Ridiculously Easy Low-Sugar Vanilla Ice Cream

Yeah, so I'm at that awkward "I've been gone for so long... How do I start-up again?" stage...

I probably owe ya'all a Summer Garden Recap - but that was kind of anticlimactic (given the Spring-Seed-Starting Frenzy!).  But I'm not quite ready to post about that...

Ehh...  When all else fails, fall back on a cheesy recipe, right?!

So yeah, one of the things I started getting into, this past summer, was yogurt-making.  This was primarily because the dermatologist had put me on antibiotics, full-time.  Antibiotics, as I'm sure you're aware, kill all bacteria - even the "good bugs" in your stomach so, consequently, I've decided that it would be best to counteract that with probiotics  in the form of homemade yogurt.

Added bonus:  It gave me an opportunity to use-up some of the AMPLE low-sugar jams that I'd put-up last year!  Half cup of yogurt, couple of tablespoons of jam, and a teaspoon or two of sweetener (I've been using mainly Splenda) - makes for a tasty, (mostly) healthy treat...

So I bought a cheesy-cheap yogurt-maker from Groupon (no clue how long that link is good for, nor do I get any "kick-backs" if you happen to click on it).

The yogurt maker came with recipes.  Plus there's a ton of recipes on the 'net as well.  Basically all I've been doing is making plain yogurt from half-and-half + nonfat dry mik (for thickness), then flavoring with whatever SF Jams I excavate from the garage!

Plain Yogurt Recipe:
4 cups half-and-half
1/4-1/2 cup non-fat dry milk
Fresh yogurt culture*

*First Batch: 1/2 cup plain store-bought yogurt (with "live cultures" - check the label)
*Subsequent batches: Just use 1-2 TBS of plain yogurt from your last batch
*Optional: You can also add the contents of one tablet of Probiotic supplement

Mix the half-and-half + NF Dry milk with a whisk.  Heat the mixture to 185*F.  I've found it's easiest to nuke it in a glass pyrex measuring cup.  Appx 5 mins to start, then check the temp with a candy thermometer.  Keep nuking in 1 minute increments 'til the "milk" reaches 185*.  Then let it cool down til it's appx 110-120*F, then add the "starter culture." (store-bought - or use your last batch)

Pour the milk+yogurt mixture into your yogurt maker.  Plug it in and let it cook for appx 8-10 hours.  The longer you cook it, the "sourer" it gets - so it's a personal taste thing...

If it separates and gets liquidy on the top (even if it's a funky color), you can just stir it back in - after cooking time is complete.  Store, sealed, in the fridge.

Serve it by mixing your favorite fruit jam and adding sweetener, to taste...

Okay, so I made up a couple-three batches of yogurt.  It really is quite tasty - but was starting to get a little boring (I'm actually not a huge fan of yogurt - to be honest!).  So then I decided that, maybe, frozen yogurt might be a bit tastier.

I surfed online and found this on Amazon.  I actually do have an electric ice-cream maker in our storage shed, but it requires ice and salt and time and - besides - it's buried under camping equipment (and it makes much larger quantities than I need or want).  This li'l beasty - with it's 1.5 quart capacity - is perfect (since my yogurt-maker makes 1 quart at a time).  I also like that the "bowl" has freezer-gel inside of it.  Toss the bowl in the freezer and it's ready-to-roll whenever you wanna mix-up a batch of Fro-Yo or...  ICE CREAM!

Yep - You were wondering when I was gonna get to the Ice Cream part, huh?!

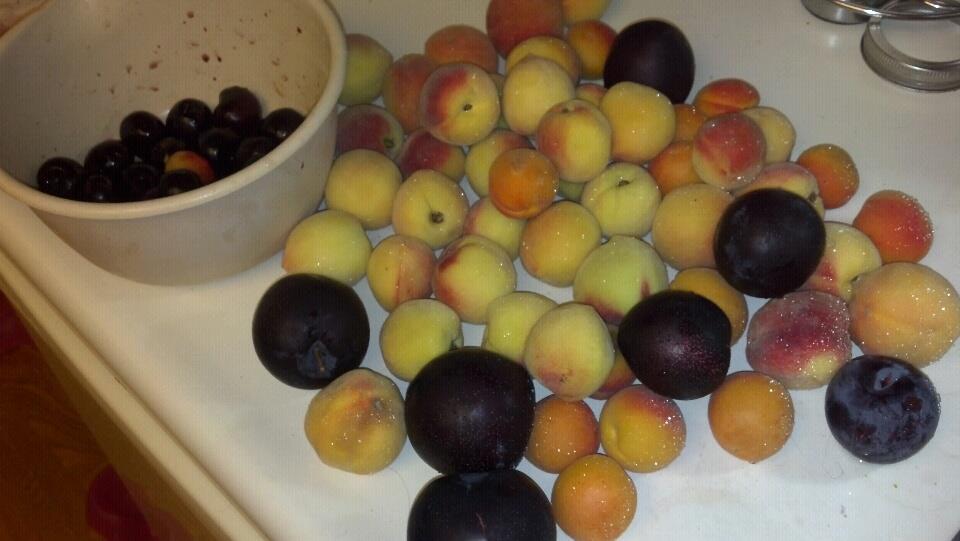
Alllllrighty then!  I am *almost* there!  My first couple of batches were actually peach Fro-Yo (Future Post:  2013 was "The Year of the Peaches" - to the point where I was actually having nightmares about harvesting peaches!).  I had some frozen "Peach-Spice Butter" out in the garage freezer.

I basically peeled/pitted a sh*tload of peaches and dumped 'em in the crock-pot with cinnamon, nutmeg and Splenda brown-sugar blend.  Cooked 'em down for several hours and pureed them using an immersion blender, then stuck the resulting gooze into plastic freezer containers.  So it ended up being 4 cups of yogurt + 1 cup of frozen peach-spice butter + a couple-three squirts of Toriani sugar-free peach syrup, all tossed into the ice-cream maker for 20-30 minutes.  Dee-lish!

And - well, I'm still experimenting with the whole Fro-Yo thing - so I'm not quite ready to start posting bona-fide recipes - yet.

But....  Since Beloved Hubs seems to suffer from Giaourtiophobia (Ooh!  New Scrabble Word!), and because I'd purchased a half-gallon of Manufacturer's Cream without checking the expiration date (it was expiring the next day - Oops!), I decided to whip-up a batch of low-sugar (but definitely NOT low-fat!) vanilla ice cream!

Cuisinart Ice-Cream/Fro-Yo Maker
(Yes, Crappy Droid Pic!)

Okay, so here is where I started:  Vanilla Ice Cream Recipe

And this is where I ended up:

QT's Ridiculously Easy Low-Sugar (but not low-fat) Vanilla Ice Cream
Yield - appx 9 @ 1/2 cup servings

Ingredients:
  • 2C Heavy Cream 
  • 2C Half-N-Half
  • 1T Vanilla
  • 1/4C granulated sugar
  • 1/4C granulated Splenda
  • 1 small pkg (1oz) sugar-free instant vanilla pudding 
Instructions: 
  1. Make sure the cream and half-n-half are well-chilled (stick the cartons in the back of your fridge).
  2. Combine vanilla, sweeteners and pudding mix into the half-n-half.  Whisk until well-blended.  Then add cream and stir it in.
  3. Pour the mix into a chilled ice-cream maker and let 'er rip for 20-30 mins (mine was done in appx 15, actually).
Super-Duper Creamy and delicious!  Recipe notes:  I was reading where folks were complaining that the recipe ended up being more like "butter" than ice-cream so that's why I am suggesting that the cream gets blended in LAST - and make sure it is super-chilled before doing so.  I didn't experience "butter" - but I figured I'd make mention of it...

I expect that I'll be doing a lot more experimentation with Fro-Yo - as well as Ice Cream.  And probably something incorporating protein shake mixes as well.  When I experience "successes" I will make an effort to post 'em here...

Cheers!

-QT


Wednesday, September 11, 2013

"I'm not dead!"

Warning:  No interesting "content" here - just a whole lot of rambling!  If you're looking for something useful, then "Move-along...  Nothing to see here!"
Ahhh...  When all else fails, you can always fall-back on Monty Python - amiright?!

Jeez, look at this place!  A bit dusty, wouldn't you say?  I simply *must* talk to the housekeepers about that!

Yeah, sorry for the hiaitus.  It actually wasn't planned - Quite the contrary!  I was rather looking forward to having a simply STUPENDOUS summer or - at the very least - an insanely productive Garden Season.

Sadly, it just didn't work out that way.  I kind-of had a somewhat Crap-Tastic Summer.  And - like my mama always told me - "If you can't say anything nice, don't say anything at all."  I think I've mentioned this before (on the outside chance you are a regular-reader here!), I want this to be my Happy Place to yak about gardening, and cooking, and canning, and "Wild Hairs" and funky projects, and artsy-fartsy stuff, and basically anything that brings a little happiness into my world.

Sadly, Old Age - and all of it's annoying accoutrements - seems to be rearing it's ugly head (and I don't remember ANY OF THIS being mentioned in the handbook - dammit!).  Between my beloved hubs - who had knee-replacement surgery earlier this year (and is now facing complete tooth-extraction - "Hello, False-Teeth-in-a-glass on the night-stand!")...  And then me with all of this irritating (and indescribably Itchy and Painful) skin condition bullsh*t...  Well, let's just say that I might have set my expectations just a leeeetle bit too high when it came to Summer's Glory.

:::sigh:::

I don't want to whine tooooo much here, so I'll try to keep it brief (HA!).  To be honest, hubbies TKR procedure when extremely well, and he is well on his way to a full recovery.  But my skin condition (which is NOT psoriasis - and the doctors reached this conclusion because.... [drum-roll please!]...  It doesn't respond to ANY psoriasis-treatments - HAYYY!!!), well, let's just say that my skin condition continues to plague me and *still* seems to NOT respond to ANY treatments WHATSO-F**KING-EVER!

After two (count 'em: TWO!) overnight stays at two different hospitals (First was our local E/R.  The second was Stanford Medical Center - because my dermatologist didn't know what else to do with me!), well, I think we FINALLY got my doctor's attention, anyway...

I really-really-really don't want to rant about this, here (Ohhhh, it is sooooo tempting!  But what good would it do?!  Nada!).  Anyway, the bottom line is: I have been, pretty-much, a shut-in ALL SUMMER LONG.  And by shut-in, I mean - sometimes I am in such miserable shape (read: PAIN) that I haven't even been able to walk out to the patio to water my plants, let-alone make my way back to the garden.  Canning? Fugeddaboudit!

Thankfully, we have awesome neighbors and friends who were willing to pitch in, when things were at their bleakest.  So there's THAT (Bright Side!!!)

So that is my lame (but honest) excuse for disappearing (and Thank You - O' Long-Time-Blog-Follower - for "checking up" on me!  I never realized I even *had* followers!  I know I've got 'readers' - but I suspect they are mostly Hit-And-Runs looking for recipes (Ironically, my '# of visitors' reports are higher since I've stopped posting - go figure!).

Anyway, I shall make an honest effort to spend a little more time here.  I'll start posting recipes again, and maybe throw-together some kinda Summer Recap (such as is!). And, lastly:


No Whining!!

"Talk" soon!

-QT

Saturday, April 27, 2013

Recipe: Apple Cranberry Walnut Pie (AKA "Best pie you ever made")

Apologies for the crappy Droid pic.
We dug into this bad-boy FAR too quickly for me to snap a good picture!

I haven't posted many recipes lately.  Mostly because I haven't been cooking much lately.  Fact is, I've been too busy getting dirty in the garden and/or just plain lazing outside and enjoying our AMAZINGLY good weather!

Anyhoooo...  I decided it was time to bake SOMETHING, and the apples were threatening to overtake my kitchen sooooo...  How 'bout Apple Pie?  I Googled a bit and got a few ideas...  Apple pie is good, but... What else can I add?  I ransacked the cupboards and found a couple of (partial) bags of glazed walnuts and Craisins and a jar of my home made Cranberry-apple Jam - Hey!!!  I Googled some more and - while I thought that 'Apple+Cranberry+Walnut+Pie' must be a New and Unique Flavor Combination - "Not so, Kemosabe!"

I found lots of Apple-Cranberry-Walnut "Cobbler" recipes. But I wanted Pie so this is what I came up with...

And, I should note, that Hubbie has declared that this is "The Best Pie you EVER made."  With a recommendation like that, how can you POSSIBLY go wrong???

QT's Cranberry Apple Walnut Pie
(with low-sugar substitutions noted)
Yield one 9" deep-dish pie

Ingredients:
  • Appx 2 lbs of tart baking apples (this worked out to roughly 6 medium-sized Granny Smiths for me)
  • Lemon Juice
  • Half-pint of Cranapple Jam (ver 1.0)  (or half-a-can of whole-berry cranberry sauce)
  • 1/4-1/2 cup dried cranberries
  • 1/2 cup glazed walnuts
  • 1/3 cup granulated sugar (or substitute Splenda or C&H Light*)
  • 1/3 cup dark brown sugar (or substitute Splenda Brown Sugar Blend*)
  • 1/2 tsp ground cinnamon
  • 1/4 tsp ground nutmeg
  • 2 TBS flour
  • 2 TBS butter, softened
  • crusts for 9" two-crust deep-dish pie
  • 1 egg white (optional)
  • Coarse granulated sugar (optional)
Instructions:
  1. Preheat oven to 425*
  2. Wash, peel, core and chop the apples into 1/2" chunks (appx)
  3. Drizzle a little lemon juice on top of the apples as you're chopping and dumping them into a large bowl (keeps 'em from browning)
  4. Dump in a jar of Cranberry Apple Jam.  Or, if you don't have jam (and I realize you may not!), you can increase the quantity of apples and/or dried cranberries. Orrrr you could toss in  half a can of store-bought cranberry sauce (:::GASP:::) and increase the spices accordingly...
  5. Dump in your dried cranberries and glazed walnuts (mine were store-bought from the produce aisle: I found a couple of brands: Fresh Express or Emerald) (Or I'm sure you can find a recipe for glazed Walnuts if you ask Google nicely!)
  6. Add sugar, spices and flour.  Mix gently until everything is well-coated.  Give it a taste and adjust as you see fit!
  7. Pile the pie-filling into the bottom crust (Yep, I'm still using frozen pre-made crusts).  Mound it up in the center.  Cut up your butter and blorp a few blops on top of the filling.
  8. Moisten the edge of the bottom crust with your finger, dipped in water.  Unroll the top crust and place it on top.  Trim and crimp the pie crusts together.  Cut a vent hole and a few slits in the top.
  9. Optional: If you want a shiny sprinkly crust: Whisk an egg-white with about a TBS of water and brush it on top of the crust (do not cover the vent holes or slits), then sprinkle with coarse granulated sugar.
  10. Bake at 425* for appx 30 minutes, then reduce temperature to 375 and bake for an additional 15-20 minutes or until golden brown**.
  11. Allow to cool a bit before serving.
*Notes on using sugar substitutes:  Like jam, I find that pies "perform" much better if you've got at least some sugar in it - otherwise it doesn't have the right texture (I'm not fond of "soupy" pies!).  I generally try to cut-back to roughly 1/3 of what the original recipe called for (in "real" sugar), and then "fill-in" with granulated Splenda or Stevia. And I almost-never end-up with the same quantity of sweetener than what the original recipe called for (but I don't like Super-Sweet stuff).

**Notes on baking times:  I use a microwave/convection combo oven, so your cooking times/temps may vary (but probably not by much - to be honest!).  Just keep an eye on your pie is all I'm sayin'!

Final notes on this recipe (in general), this is one of those instances where I was tossing things together and not necessarily paying SUPER close attention to what I was doing.  Then, I scribbled my notes down, from memory, afterward.  In other words: Consider some of these measurements to be "approximate." (i.e. the original-original apple pie recipe I started with called for 3# of apples - which was  waaaaay too much, so I "guesstimated" it down.  And I still have a plastic container of pie-guts in the fridge!).  Feel free to adjust as needed!

I plan to make this pie again, next week, when my Aunt comes to visit.  Next time, I'll pay closer attention and write it down as I go! (Heck, maybe even take a better picture of it next time - HEY!)

Pie in the oven
I got CRAZY with mounding the fruit in the center and it barely even goozed!

And yes, it was AMAZINGLY delicious!


Tuesday, April 23, 2013

Seedling Madness - Pictures!

Seedling population got reduced by half today...

Here are the pictures - before the "Mini-Master-Gardener's-Sale!"

Note to self: Vining plants with swirly tendrils should NOT be grown right next to tomatoes!

I don't think we planted enough tomatoes!

Drowning in maters!

Divvying up the spoils!


Monday, April 22, 2013

It's Official: I am Sick of Seedlings!

So much so, in fact, I don't even feel like posting pictures!

Suffice it to say, the vast majority of them did extremely well.  I think I ended up with over 100 x 3" square pots of Veggie Seedlings.  I'll post the final tally after Friend-P and I get together and divvy them up.

So, for about the last 2-3 weeks, the babies got moved outside full-time.  They're still in their little pots in seedling flats, and they still need daily watering.  There were a couple of nights where temps dipped back into the 40's (and Finnyknits aka Indie-Farms posted a warning on Facebook - Thanks Finny!) so on those nights, they got dragged back into the greenhouse...

No more!  I am sick to death of dragging seedling flats in and out of the greenhouse twice daily!

In the meantime, the raised beds have been Tested and Amended.  I'm just waiting for the temps to TRULY stabilize, and the soil to warm-up, before I stick 'em in the ground.  And, of course, I have WAY more seedlings than I have real estate - so I'll be pawning some off on friends and neighbors.  And whatever I don't give away...?  Well, I'm thinkin' "Garage Sale!" - post some signs over near Home Depot and see if I can't "downsize" a bit!!!

And I think I've pretty-much decided that yes, I am going to do this again next year - only I'm going to focus on more quantity and fewer varieties - with the express intention of selling them in springtime.  I actually really did enjoy the "Hang-Out in the Greenhouse" aspects of seed-starting back in February-March - ANYTHING to get me out of the house, right?!

Another Crazy Idea - which I have shared with Friend-P since she is a Woman of Action - maybe we'll start some 6-pack assortments of herbs for a "Windowsill Herb Garden."  And maybe make some nice hand-built ceramic pots for growing said Windowsill Herb Garden.  Seems like a nice Mother's Day Gift kind of idea...

Anyhoooooo...  I know it's been awhile since I checked-in here - so I figured I'd scribble a quick post so you wouldn't think I'd died or anything!!!  For now, I am going to sit here, enjoying the 90* temps (Yayyyy!!!!!), sipping a margarita at our brandy new (just-like-the-old-one-only-newer) Tiki Bar....

Me = Happy :-D


Saturday, March 30, 2013

It's T & A Time!!!

T&A! T&A! T&A!

No, not T*ts and @$$, you perv!  Test & Amend!  Yayyy!!!

Doesn't sound too exciting?  Welllll...............................

If you want results like this:


And this:

Or maybe like this:

And this:

And, of course, who can resist this?!

Mmmmm :::drool:::

If you want to experience the above, firsthand, well you're gonna have to do this:


I first blathered about it here...  Or, you can skip my blathering, scroll down to the bottom of that post and find the links to Finnyknits' (aka Indie-Farms) blog where she explains Soil Testing and Organic Amendments very clearly and all scientific-like.

Feed your soil - and it will feed your plants!

So, if you're a South Bay Gardener - Run!  Do not walk to your nearest Garden Supply Store and buy yourself a Soil Test Kit.  Do it NOW - before the warm weather truly hits!!!


Sunday, March 24, 2013

More Gardening Madness and Bonus Bee Story!

So yeah...  Been bizzy-bizzy-bizzy this past week or so!

Friday afternoon, I granted myself a little "Comp Time" from work and logged-out an hour early so I could drive up to San Mateo for the annual San Francisco Flower and Garden Show.  It's an Annual Thing - kinda like one of those "Rites of Spring."  I feel like, if I missed it, it wouldn't *really* be Springtime!

Springtime?!

Why yes please!  And thank you!! :-D

The Garden Show actually doesn't change a whole heckuva lot.  Of course, the displays change - but it still seems like the same thing year-after-year - and I wouldn't miss it for the world!

I took a bunch of pics with my Droid while I was there but, unfortunately, none of 'em were particularly post-worthy.

Nevertheless, I did enjoy perusing the vendor booths and stealing getting inspiration for different types of ceramic garden art.  They had all kinds of cool stuff - from ceramic wind-chimes, to bird-houses, to funky brightly-colored ceramic sculptures that could be threaded onto a tall length of rebar.  I'm kind of thinking I need to make a sandworm (a la Beetlejuice) to slither and tunnel through my veggie beds!

I did make a couple of smallish purchases:  A new "not-so-deep" harvest basket, a metal duck sculpture, and a few tiny succulent plants.  I showed GREAT RESTRAINT in the Plant Vendor Zone - and I even walked past Love Apple Farms' booth without stopping! (Trust me - with appx 130 seedlings in the greenhouse - I do NOT need to purchase any more tomato plants!!!).

Rusty the Duck, guarding my veggie beds

I also purchased a new garden apron - but not at the Garden Show, actually.  I bought myself a Roo Garden Apron (online) and I absolutely LOVE it!  I'll admit, I was a little dubious about the "One Size Fits All" claim.  I am most definitely an ample person (and not at all by choice!).  I am happy to report that yes, indeed, for the Roo Garden Apron - it really is One Size Fits All!

Nope.  No spliff.  I just genuinely like the apron.  In fact, just for grins yesterday, I stuck one of the dogs into the Roo-Pouch/Pocket thingie.  Dog weighs appx 13# and - while she didn't like it - it wasn't at all uncomfortable walking around with the apron carrying a 13# dog!  I especially like all the pockets in it (like for your cell phone, or a pen, or shears, or whatevers).  

Let's see, what-else, what-else, what-else?!  Gawd, there's been a lot going on and I don't want to get too rambly!  

Let's just focus on the Garden Seedlings then...........

First bit o' drama was the sudden realization that as the plants get potted-up, the amt of available space in my greenhouse shrinks exponentially!  I needed more pots and more flats.  I'd found the pots on eBay, and I found several online sources for seedling flats - but shipping was "Are you freaking kidding me?!!"  Well, as luck would have it, we've got a Hydroponic Supply Store nearby, Rasa Hydroponics.  They have a nice selection of seed-starting supplies (including soil organic amendments), including 3" square pots and flats - competitively priced even!  So I am all set!

Today's photographic updates:

Getting ready to Get Dirty!
Roo Garden Apron and my spiffy new harvest basket

In the course of potting up, I did discover a few plants that seem to be suffering from damping-off.
I dragged out the spritzy bottle of chamomile tea - maybe they'll bounce back.

More potting up...  The entire lower-shelf is covered with flats, and I'm moving up to a second shelf.
I have added another 4' light fixture (So 2 x 2' Grow lights + 2 x 4' Grow lights!)

My first Zucchini is finding a new home!

Sooooo...  In a nutshell...  I started out with 131 mini potlets of seedlings.  I was actually forced to create a spreadsheet to keep track of 'em all (AAAACCCCKKKK!!).  4 never sprouted and got tossed.  As of now, 78 have been potted-up with 49 remaining.

I have two flats (cucurbits and tomatoes) that are currently cycling in and out of the greenhouse.  Out in the sun during the day, then back in the greenhouse at night...  Starting tomorrow, I think that's going to become 4 flats that cycle in and out (and I haven't quite figured out where they're all gonna go!).


Making a batch of Buckaroo Worm-Poo-Stew
For foliar feeding...

Annnnnnd...  I started a batch o Worm Poo Stew (aka Worm-Casting Tea), as per Indie-Farms recommendation.  I wandered a little off-course and decided to dump my worm-poop into a pouch made from old pantyhose (I don't want to strain it later!).  I'll let it steep in the bucket for a day or two, then put it in a spritzy bottle and spray the plants.

Next up:  The Annual Test-And-Amend Ritual (I'll start that next week).

Annnnnd...  A mini-update to the Bee Saga (which I never finished, but it seems like the story refuses to end!!!).  Here's a preview:

That is a bona-fide SWARM!

Okay, that's enough for today!  Happy Gardening!!!!!!!!!!!!!!

xoxo

-QT


View my page on Meet the Phlockers