Showing posts with label Gadgets. Show all posts

Friday, April 1, 2016

Here we go again with the "Sorry I'm a Lousy Blogger" stuff (Unboxing a New Toy!)

Yeah.  Well.  Life Happens!

I'll skip the B.S. Apologies (particularly since I'm not even sure if anybody reads my crap regularly anyway!) and just dive right into the latest Adventure!

QT, the BQ-Ho, bought a brandy-new pellet grill!

I was at the SF Garden Show a couple of weeks ago - mostly looking for inspiration/motivation to get off my @$$ and get my garden ready for spring.  I was also doing "Reconnaissance Work" for me and P - since we are contemplating setting up a ceramic garden-art sales booth at this show, next year.

Turns out, the organizers of the show have taken significant steps to make the show *much* more Vendor-Friendly.  Now attendees actually have to walk through the vendor area before viewing the Display Gardens (and I believe they've lowered the cost for booth-space)...  

Before I get too rambly (HA!), I'll say that the "walk through the vendor space" was a very effective technique because - somehow or other - I ended up getting sucked-into a sales pitch from a Traeger Pellet-grill Rep!

Now everybody knows what a Ho I am, when it comes to good BBQ.  And I have shared some of my Smoking (Mis)Adventures on this very blog.  I'm still limping along with the Pedazo-de-mierda Brinkmann Electric Smoker (did a tri-tip a few weeks ago - came out "pretty okay" - but I mis-timed everything and the meat got cooked before the smoke even got started - ooooops!), but I think I'm about ready to "graduate" to something nicer.  And - much as I hated the "Last hot dog in the ballpark" sales spiel from the Traeger-dude - I did find myself very intrigued over the whole pellet-cooker idea.

Of course, I am not one to spend $400+ on a whim (Well, except for Stormageddon!) (Although it *did* take me a month to complete that Impulse Purchase!).  The Sales-Dude was really... "motivated" (yeah, that's the word!) to sell me a cooker.  Once he determined that my Price-Point was "CHEAP," he focused on trying to get me to buy the Jr. Elite model which is little-more than a tailgate smoker in size. And he kept throwing in "extras" to entice me to buy: Free grill cover!  Cookbook (srsly?!).  I'll even throw-in a 20# bag of pellets...

Long story short:  I didn't buy it.  I wanted something bigger - *and* I wanted to do more research.  

Researching pellet-smokers is kinda like stapling Jell-O to a tree.  Broad assortment.  Many different "features."  Huge price differences (with the general consensus being "You get what you pay for.").  Many websites were surfed.  Amazon (especially the customer reviews), AmazingRibs.com, Pelletheads.com, were some of the main ones.  There were others, I'm sure!  Pretty mind-boggling, to tellya the truth!

The general gist of  these pellet smokers is that you fill a hopper with hardwood cooking pellets (they look like rabbit food), and there is an auger assembly that feeds the pellets into the cooking chamber.  At the bottom of the cooking chamber is a burn pot which has a glow-plug and fan to ignite the pellets and keep them cooking.  There are also thermometers incorporated into the unit that create a feedback loop.  Basically, you dial-in the temperature you want, and the thermometer tells the auger to deliver more (or less) pellets to the cooker in order to maintain the desired temperature.

Kind-of / Almost "Set it and Forget it!"  Which is WAY better than having to constantly fuss, and add wood chunks, and hope it doesn't over-smoke, and oh-crap-need-to-soak-more-wood, and is it DONE yet?!

Some pellet smokers have less temperature control (Low-Med-Hi), some have what-are-called PID controllers which are supposed to dial-in temps even closer.  Hell, some have WiFi controls so that you can monitor (and even turn on/off) your cooker from your phone!  It seems that most of the "decent" smokers are gonna start in the $500 range, but you can easily spend thousands of dollars!

Yep.  Mind-boggling!

I ended up going with the Camp Chef PG24DLX - more than ample-enough for the two of us, but still large enough for a Pool-BQ party.  Beer-can chicken oughtta fit in there, just fine.  I bet I could even smoke a decent-sized turkey breast in there!

Some of the "features" that I liked about it were:

  • It does have a dial-in temperature control (160 - 500*, in 25* increments).  It is not PID, however.
  • It has a pellet-purge function
  • Clean-out is pretty simple. Just pull a lever that "dumps" the ashes into a cup (so you don't have to completely disassemble the grill and suck-up ashes after every use).
Size and Price seemed about right.  Big, but not huge.  And under $600 (all-in - including shipping). Spendy, but (I hope) a worthwhile investment!

I bought it from OutdoorCooking.com.  Got a free custom grill-cover and shipping was quick and free (Not Amazon-Fast, but still very reasonable) - and I am very satisfied, so far!

Unboxing:

Man, I have never seen a FedEx driver deliver and disappear so quickly!  He had a huge hand-truck and was able to drop the package on our front step, banged on the door and ran like hell!  Had it been my UPS guy, I have no doubt he would've stuck around and been willing to drop the (very large/very bulky/very heavy) box in my backyard.  Ah well!

w00t!  My new smoker is here!

I grabbed our hand-truck and quickly discovered that it was too heavy/bulky for me to maneuver onto the hand-truck on my own (and Hubs was out of town on business).  I texted my neighbor - to no avail.  Then - realizing that at least the box was up *one* step - I figured that MAYBE I could wrestle it onto our flatbed cart.  Yay!  Success!

I got it to the backyard and waited til late afternoon to begin The Un-Boxing!!


Oh dear, what have I gotten myself into???

Actually, I have to say that this thing was *very* well-packaged, in heavy-duty cardboard and super-sturdy styrofoam.  The cool thing was - once you lifted-off the big upper box/lid, the inner-box (which was highly resistant to my box-cutter) actually doubled as a soft assembly surface.  I gave-up on slicing the cardboard at the corners and, instead, cut the tape that was holding the bottom-box together.  Once the tape was sliced, the box fell-down flat.  Well, it would have - had I decided to assemble it in a large unobstructed area!  Instead, it was leaning-up against my table-legs and trash bins!  I was able to maneuver it around a bit, so it was mostly flat.  But bottom-line: Excellent packaging by Camp Chef because assembling it on cardboard kept me from scratching the hell out of it!


It came with a good, well-written instruction manual.  I'm pleased to say that most of the assembly was "done" before I opened it.  I just had to install the legs, chimney, handle and right shelf.  Finding all of the pieces was kind of fun:  The legs were inside of the cooking chamber.  I didn't figure that out 'til I'd already laid it on it's back.  

She's got leeeeeggggs!
She knows how to use 'em....!
(Sorry - channeling ZZ-Top!)

Nah - all things considered, this was pretty Easy-Peasy to assemble and I did it all myself in less than an hour (with plenty of margarita breaks!).  

Ain't she purdy?!

So yeah - Easy to assemble.  Well packaged. Shipped quickly.  Free cover (sorry no photo of that yet - but it's awesome!).


And since I didn't want hubbie to feel left-out, I let him deal with all the cardboard and styrofoam! See how thoughtful I am?!!  Oh, and then he gets to go 'round and tighten all the nuts and bolts that my girly wrists couldn't tighten sufficiently!

Okay, I think that's enough for one day.  I'll post more - after I finish the "christening" of my new smoker (which is happening today - Right Now, in fact!)


Monday, August 24, 2015

Crafty Crap: Dollar Tree Mason-Jar Solar Lights (and Doggie-Rambling)

I can't imagine that this is a unique idea, but I figured I'd post it just the same!  Oh, and I'll probably start-out rambly - so consider yourself warned!!

See, we've got a "Special Needs Dog," Tazz-The-Spazz.  She has shattered all of my Old-Wiener-Dog Records by living well beyond the 14-1/2 year mark.  In fact, she is approaching 16 now!  She is our "Full-Throttle-Dog" who has always lived life to the fullest!  Our racing champ, and a veteran of multiple surgeries (including two neuro-surgeries for her back - which makes her OFFICIALLY more expensive than my Harley!).  

Tazz has definitely slowed WAY down in her Golden Years.  But, thus far, she still seems to be comfortable and happy - and I am committed to keeping her that way.  Her meals are all home-cooked (ground turkey and rice), she takes glucosamine daily, and when she feels creaky (i.e. rainy, cold days), we give her Rimadyl (basically doggie-aspirin).  If she ever reaches a point where we can't keep her comfortable...  Well, we'll make the appropriate "decision" for her.  But let's not go there, k?!

Seriously, she's still doing Pretty-Okay for an old girl.  She gives herself exercise by having "walkabouts" in the yard - usually 2-3 times per day - she walks the perimeter (and it's a mighty-long perimeter, especially considering that her legs are only about 3" long!).  

And she *still* gets excited when papa throws her tennis ball.  Seriously!  This dog is absolutely POSSESSED when papa throws the ball.  Now when mama throws it, "Meh!" She'll kinda half-heartedly galumph for a stride or two, then slow to a ramble.  But papa?!  Hell, she RUNS!  If she catches it on a bounce, she'll roll around on the grass in sheer delight!   She even still brings the ball back - on "good" days - but she's a far cry from the OCD Ball-Chasing Lunatic that she used to be (When it got so bad, we'd have to take her ball away.  She droves us absolutely CRAZY)

Yay!  Papa's throwing the ball!

We are making reasonable accommodations for her.  Her hearing isn't what it used to be, and her vision is definitely deteriorating.  We've had to keep the pool covered this summer (due to the drought - we want to minimize evaporation), and I am terrified of the dog falling in and slipping under the cover.  So we installed "landing lights" around the pool (solar rope lights).

Weenie-Dog Landing Lights
(view from the diving board end)

Cooler-lookin' view - including the TiKi BaR
We don't leave the pool-light on when it's covered
Just the rope lights around the perimeter

We also installed a Doggie-Door for Tazz, and she has the luxury of "freedom" to sleep wherever she chooses (the youngsters sleep in their crate).  Tazz sleeps, pretty-much, all of the time!  But she alternates between her two beds in the family room (one with a doggie-heating-pad and woobie, and a second unheated bed), and the doggie-bed/woobie combo in the kitchen.  

She seemed to be having some trouble locating the doggie-door at night, however, so I bought some cheap solar lights from the Dollar Tree (that kept falling over and rolling away!).

Okay, so THAT brings us to my Crafty Crap post! (Jeez!  FINALLY!)

Last week, this showed-up in my In-Box from Living Social:

Hey - Crappy cell-phone pic!
$14.99 for one solar mason jar light 
$39.99 for three.  Plus $3.99 shipping

Seemed like a cool idea.  But at almost $20 apiece I was *not* feelin' the love!  Hey - I've got all these tippy-over solar lights in the yard already, and Gawd-knows I've got a sh*t-ton of canning jars!  Maybe I can make some myself!  Here is what I did:

All the stuff you'll need:
(Minus the better-battery)

Start with a Dollar Tree Lamp like thus:
 It's actually a pretty cool-lookin' lamp
But unstable as hell!

Our Dollar Tree had a few of 'em left (end of summer).  They had black or white available, but I think they came in other colors as well - doesn't matter.  Also, you don't *have* to use this specific lamp - look for anything that has a top "puck" (circled below) that will fit inside the top ring of a mason  jar. 

The circled part is the only piece you'll need.

Next thing you're gonna do is take the lamp apart.  Remove the shade (which blows away when it tips over anyway!), then unscrew the top "puck" which contains the LED bulbs, a battery and the solar panel on top.  You may or may not want to use the bulb cover/diffuser (white cover directly under the "puck").

Cost, so far, $1.00

Now this next step was one I'd skipped, the first time around.  But it's a necessary step!  See, Dollar Tree lamps come with anemic AAA 100mAh Ni-Cd batteries that will not last through the night (they actually only stay lit for about an hour).  

Replace that bad-boy with something "juicier!"  I happened to have some 850mAh NiMHs laying around.  Google tells me that you can find even juicier rechargeable AAA's for appx $2.00 apiece.

This particular lamp has two teeny screws.  Unscrew 'em and open the puck to reveal the battery:

Anemic battery (yellow) - Dump it!
Better Battery on the right

Now I should note that the overall construction on my Dollar Tree lamp was...  Well, it's a Dollar-Tree Made-In-China piece of crap!  There are little clips at the top and bottom of the battery that wanted to pop-out while I was replacing the battery.  It required a little dexterity, but wasn't too difficult to complete the battery swap.  You do need the clips in place, and in contact with the battery terminals, otherwise it won't light up.  Put the thing back together and you're ALMOST done!

Cost so far:  Figure $3.00 (I'm still at $1.00 'cause I already had the batteries!)

Okay, next is fitting the "puck" into the mason jar ring.  Dollar Tree does carry mason jars, but I think the ring-opening on the top is a squee-bit bigger than the standard Ball/Kerr jar rings.  It really doesn't matter - as long as the puck is a fairly close fit.  You're gonna tweak-it larger by running electrical tape around the outside of the puck.  For mine, 4-5 layers of tape got me a good snug fit:

Dollar Tree sells electrical tape - Bada-Bing!

Next, you''re gonna want to snugly-fit the tape-wrapped puck into the top of your mason lid/ring and screw it onto the jar.  Now, depending upon whether you get rain in summer (not-so-much in parched California!), you might want to run another round of electrical tape at the point where the light-puck meets the jar-ring - to keep water from getting inside.  I don't think that water would hurt the light, but I would imagine it could get pretty "funky" in there if water got inside the jar.

Easy Peasy!

Cost so far: $4.00 (assuming you bought the jar at Dollar Tree - and I'm not counting the electrical tape in the cost)

So this is "okay" right now, but it's not gonna shine very brightly without something to help diffuse the light.  As I'd mentioned earlier, you could just use the lamp-cover/diffuser that came with the lamp.  I had originally considered buying a can of glass-frost spray at Home Depot, but my Dollar-Tree Compadre, P, came up with the brilliant idea of using glass pebbles in the jar (from Dollar Tree - Heyo!).

So, fill your jar almost-to-the-top with glass blobby-pebbles.  A pint-jar will use almost two full bags of pebbles.  And I would suggest using "mostly" clear pebbles, with maybe a few scattered colors.  You'll see, later, how the different color combos worked out, after dark.

Here is the first lamp, filled with mostly aqua-colored glass blobs:

Purdy!
(but not very bright, unfortunately)

Total Cost: About $6.00 apiece (Lamp $1 + Battery $2 + Jar $1 + Glass Blobs $2)  :-D

Okay, more pics...

Here are two jars - out in the sunshine.  The one on the left is the mostly-aqua blobs.  The one on the right is all-clear blobs in a blue jar.  The one on the right also has the "extra" electrical tape (for waterproofing), but I did a sloppy job with that (which is why I decided it wasn't necessary in parched-California!).

Even Purdier!
Oh, and they are definitely NOT 
gonna tip-over in the wind!

What was interesting:  I played around with the clear-blob lamps, after dark, and I really didn't notice a difference between clear-blobs in a blue jar vs. clear-blobs in a clear jar.  So if you want "pretty" in the daylight, and decent lighting after dark, use the blue jars with clear-blobs.  The colored-blobs really do cut-down on the amount of light, so I recommend sticking with clear-blobs, and maybe toss in a few random colored blobs for interest...

Okay, most of my "after-dark" pics were pretty crappy and, honestly, they aren't super accurate.  The camera compensated with a long-exposure so the pics appear brighter than they are in person.  Nevertheless, here are some pics:

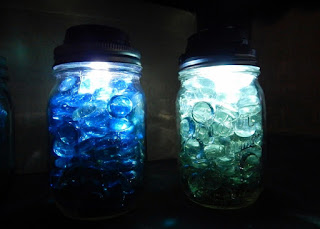
Left: Aqua Blobs in Clear Jar
Right: Clear Blobs in Blue Jar

Left: Same as above
Right: Clear Blobs in Clear Jar
(not much difference)

Then, since I'd run out of glass blobs, I decided to make one more - using the plastic diffuser thingy from the original Dollar Tree Lamp.  Here are 3 together - next to the Doggie Door:

Left: Aqua Blobs in clear glass (least light)
Center: Clear in Clear
Right: Diffuser in Blue

So there you have it!  My (successful) attempt at making solar-powered mason-jar lamps for *well* under $20!  I like 'em and, while they aren't super-duper-bright, they do the job!  Tazz can find her way to the back door after dark!  Yayyy Me!


Sunday, August 10, 2014

Recipe: QT's "I-did-it-MY-way" Grape Jam (using a Tomato Press)


Gonna start-out rambly (Surprise!), but I'll get to the recipe soon enough!

Our backyard is a veritable treasure trove of tasty snacks throughout the growing season!  I especially enjoy the "Surprise" harvests that come from plants that I had long-since forgotten!

Take my grapes, for example...  Shortly after I moved in here - I'm gonna guess maybe 2001-2002-ish - I'd planted a couple of bare-root grape vines out by the back-fence.  I wanna say that they were some variety of wine-grape - but damned if I can remember now, right?!

Yeah, so over time, one of the grape vines seems to have disappeared, and the other one has grown quite vigorously - without me even realizing it! (to be fair, it is tucked away in a corner where we rarely venture!).  Last year, I think I picked a couple of small bunches of grapes - and promptly ate 'em!

But this year, imagine my surprise when I stumbled onto this:

Whoa!  Forgot about you! (July 19th)

Nevermind that the vine has grown completely over the fence, and those grapes that were approaching ripeness were up at the top of the fence (which has got to be, like, seven feet tall!).  There were also several bunches on the OUT side of the fence (I'm sure the passers-by are enjoying them!).

In any event, I think there will be some *serious* grape-vine pruning this winter!

Yeah, so, I went ahead and harvested as many grapes as I could reach, and ended up with a respectable basket's worth:

Couple pounds' worth, anyway...

So what on earth can I do with a couple pounds worth of grapes?  Not much!  They're not very nice as table grapes.  Not sure if they're "wine" grapes or not - but they're kinda like smallish Concord Grapes (thick skins, you have to pinch 'em to get the innards out, and the innards contain large-ish seeds).  Ehh, let's just call 'em Concord Grapes, k?

Squeeze 'em for juice?  Meh!

Ohhhhh, let's just try to make jam  (NOT jelly!) - shall we?  Followed by the usual refrain "Ohhhhhh Gooooooogle!"

I have to say that, while Google gave me LOTS of websites and recipes and YouTube videos and yada-yada for making Concord Grape Jelly and/or Jam, they all looked like a BOATLOAD of work and/or required "Special" (read: Expensive) equipment.  I do have a Big-@$$ Juicer, but it's the "centrifugal" type that can obliterate a whole apple in 1.5 seconds-flat.  I think grapes are better suited for "squeezy/squishy" types of juicers (which I do not own).  

The websites that didn't require funky-juicers called for separating the grapes from the peels - by hand - which seemed about as appealing as banging my thumb, repeatedly, with a hammer!

I do have a Foley Food Mill (honestly, not my favorite tool), along with assorted wire-strainers.  I also have an Italian Tomato Press (Affiliate Link) - which I wouldn't live without!  I *love* this gizmo and have used it every year to squeeze out tomato gooze without having to boil/blanch/peel the 'maters.  It does a damn good job of separating the skins and *most* of the seeds, leaving just the meaty/juicy tomato bits for freezing or saucing or canning (or all-of-the-above!).

I tried Googling "Use Tomato Press On Grapes" but didn't find any useful info...

Guess there's only one way to find out if this is gonna work, right?!

So first-up, I think I'm gonna need more grapes:

I feel like such a FRAUD!

I bought a few pounds of these Thomcord Grapes (quite tasty, by the way, and mostly-seedless).  Then I rinsed and de-stemmed ALL of the grapes (including mine!) until I had appx 4-1/2 pounds.  


Then I dumped 'em into my large dutch oven, added 2 TBS of bottled lemon juice, and started heating them up on medium-low heat 'til they started to get kinda smushy (not long - maybe five minutes?).  Turned-off the stove, then I used a potato masher to start smashing 'em up.


There is no way to fully-gush the grapes with a potato masher, so I let 'em cool-down a bit, then I ran them through my tomato press:

It's working!!!

Now let me say a few things about the press.  It's surprisingly good construction (mostly plastic, though).  It sticks to the countertop by way of a suction cup/foot thingie (and it holds EXTREMELY well).  You drop the fruit into the top of the hopper, then turn the crank handle.  There's a wheelie-bobber that sucks the fruit down, then forces it through a metal screen.  There's a chute - over on the left-hand side - where the GOOD grape-gooze comes out.  That chute in the middle of the front is where the skins and seeds blorp-out.  You can run the skin/seed glorp back through the machine and squeeze out ALL of the goodness.  Unfortunately, my only complaint is that the machine does tend to leak a bit of juice out through the crank-handle.  It's unavoidable, so, you see that wad of purple paper towels over by the handle?  Yeah, you're gonna want to do the same!

Run the Seeds/Skins back through the machine 'til they come out pretty dry.
Then toss it into your compost!

Grapey-Goozy-Goodness!

Grapey-Goozy Mess on the Countertop!

So yeah - after that, dump your Grape Gooze back into the Dutch oven and start to heat it up on Medium to Medium-High...

Next, you'll give it a taste to figure out how much sweetener you're gonna need.  And you'll mix the sweetener with some pectin - in a dry bowl - before mixing it into the Grape-Pot (Sorry - I didn't take pictures through this stage!)  I ended up using 1-1/2 cups of C&H Light (might also be called Truvia Baking Blend - it's basically a 50/50 mix of Stevia and Granulated Sugar), and I added about half a cup of granulated Splenda.  To the dry sweetener, I added appx 3 TBS of Ball Low/No-Sugar Pectin and mixed it well, with a fork (otherwise the pectin will clump when it hits the grape pot).

Once the sweeteners and pectin are fully incorporated, bring the pot to a rolling boil.  Boil hard for one minute, stirring constantly, then check for "set."  If it's not set properly, mix another TBS of pectin with a TBS of sweetener and add it to the pot (then boil hard for another minute).

Once it's set-up properly, pour into sterilized jars and process in a water bath (or steam) canner for 10 minutes.  Remove the jars from the canner and let 'em sit, undisturbed, on a towel for 24 hours.  Make sure they're all sealed (lid doesn't pop-up when you press the middle).  If a jar did not seal properly, you can re-process it - or just stick it in the fridge and eat it first!

All Done!

Oh My GAWD this is *mighty* tasty jam!  I've honestly never been a fan of Grape Jelly (doesn't shmear properly on your PB&J sammiches!).  This is most definitely a nice shmeary kinda jam - and it tastes DIVINE!  

The only downside is that a few teensy-tinesy seed-bits did remain in the jam (probably because the Thomcord grapes do have tiny seed-like bits).  This may have been because I ran the skins/seeds back through the press 2-3 times, or maybe I should have attempted to run it through a wire strainer (or cheesecloth) - but I don't find the seedlets to be *that* annoying!

All told - after reading all those other recipes for Grape Jams - I'm pretty happy with my "Lazy" Method!

So - to recap:

QT's "I did it MY way" Grape Jam (Reduced Sugar)
Yield: 8 half-pints of jam

Ingredients:
  • 4-1/2 lbs of rinsed, de-stemmed Concord Grapes
  • 1-1/2 cups Stevia/Sugar baking blend
  • 1/2 cup granulated Splenda
  • 2 TBS lemon juice
  • 3 TBS Ball Low/No-Sugar Pectin
Instructions:
  1. Rinse and de-stem your grapes.  Warm 'em in a large dutch oven over medium-low heat.
  2. Heat until they start to soften, then mash 'em (as best you can) using a potato masher.
  3. Turn off heat and allow to cool.
  4. Feed the grapes through a Tomato Press.  Run the "discards" (skin/seeds) back through the press 2-3 more times.
  5. Pour the grape-guts back into the dutch oven, turn heat up to medium/medium-high
  6. Combine dry sweeteners with pectin, pour into the grape pot and stir til well-incorporated.
  7. Bring pot to a rolling boil. Boil hard for one minute, stirring constantly.
  8. Check for "set"
  9. Pour into sterilized jars
  10. Process for 10 minutes
  11. ENJOY!

Sunday, March 17, 2013

March Madness! No, not B-Ball, but GARDENING!

Holy smokes!  It's been awhile, huh?!

Truth be told, I've been BUSY.  Sometimes in a good way.  Other times, not so good!  But let's focus on the GOOD, shall we?!

The greenhouse has been a very fun and productive place to hang out!  You may recall that last month, I started yammering about seed-starting in the greenhouse.

So how's that going?

Ohhhhhh....  Pretty well, I'd have to say!

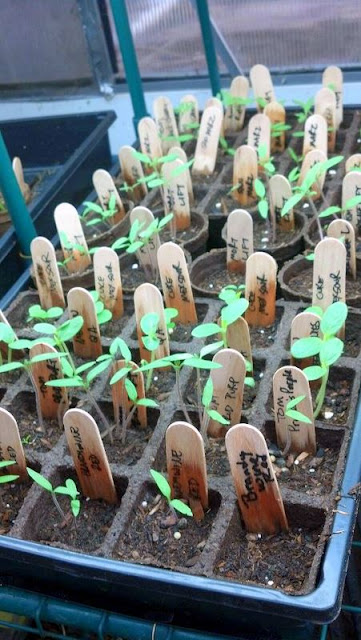
Okay, this is a Burpee Super-Sauce 'Mater I started my "Old Way"
Jiffy Peat Pellets in the bathroom windowsill

Assorted Melons, Squashes, Cukes and Zucchs 
Already ready for potting-up (March 10)

Babies are growing like mad!
(March 12)

Friend P heard about my Seed-Starting Adventure and convinced me to share some shelf space!
P's babies started March 1.  This picture was taken on March 15.

My lonely Super-Sauce 'Mater (the bathroom seedling)
Doing surprisingly well (and way ahead of my other maters, actually).
Potted-up on March 16

Ordered 150 cheap blown-plastic pots off of eBay
Jeez, I hope that's enough!!!

We've been getting some halfway-decent weather so the first batch of potted-up babies got to spend the afternoon working on their tan!

All of the babies, tucked-in for the night!

Germination rate, overall, has been pretty good (except for the some of the older seeds).  And I figure I'll plan on taking inventory and potting-up, as needed, on a weekly basis.  

I wander out to the greenhouse, twice a day.  First to open it up in the morning (otherwise it gets too bloody hot in there!).  Then again in the afternoon to "bond" with 'em.  Watering, adjusting lights, and just checking on their general welfare before I "put 'em to bed" every evening.  So far, so good!

Today I tackled a few smallish garden chores: 

Broccoli and cauliflower have bolted.
"Buh-bye!"

Two raised beds are "mostly cleared" (I even weeded!)
Cabbage, garlic and artichoke get to stay!

Former-Finny-Farm gets to stay - for now.
This bed is "mostly shade" right now...

EasyBloom Plant Sensor

This is a Geeky Garden Gizmo that Hubs bought for me a few years ago.  It's used to track sunlight, air temperatures and soil moisture. Newer models also track soil fertility (but I don't think I would trust that).  You "supposedly" can download the readings to your computer by plugging it into a USB port.  Sadly, I cannot recommend this product because I can't seem to get it to work with ANY of my PC's (Yes, I've downloaded the latest software/drivers) (and my inquiry to Customer Support went unanswered).  "Oh, well!"

I did manage to get it to work ONCE - after I'd left the sensor in the Finny Farm Bed for a week.  It confirmed that the bed doesn't get enough sun for tomatoes.  But when I went to use it again in "Recommend Mode" (where it gathers data and offers recommendations for plants that *would* grow in your specific conditions), well...  It just keeps giving me wonky error messages (PC doesn't recognize the sensor when it's plugged into the USB).

So yeah, save your money!  

* * * * *
Random Observations on Seed-Starting:
  1. It's a heckuva lot more time-consuming than I thought it would be! Not a complaint - just an observation!
  2. It's only gonna get worse after everybody's potted up and has to come out/go back in the GH daily for "hardening off."
  3. You need to do math!  I started with appx 33 Peat-Pots per flat.  Well, when the babies start to get their first "true leaves" you need to pot them up.  33 Peat Pots per flat vs 18 x 3" pots per flat means I need a lot more flats than I have (and - obv - I had to order a bunch of cheap pots, too! See above!)
  4. Need LOTS of adjustable lights.  I have my 4' Hydrofarm Grow light hanging appx 3" above the plants.  On the upper shelf, I also have my old 2' Hydrofarm Grow light fixture resting on the upper shelf (so maybe 8" above the plants?), annnnnd I have an old Aero-Garden Hood also resting on the upper shelf.  This *just* covers 4 flats.  Gawd help me when potting-up is complete and I have to start using multiple shelf-levels! (I think I'll be purchasing another cheap 4' fluorescent light fixture from Home Depot and rigging it up with more grow-lights).
  5. Peat-pots:  Jury's still out on those.  It just happened that I had ordered a bunch of 'em on eBay, so that's what I used (along with peat-based "seed-starting" medium).  I like that you can start the seeds and pot-them-up without disturbing the roots.  I do end-up tearing-off the top 1/3 of the peat-pot when I transplant into larger plastic pots - plus I try to plant them deeper (especially the 'maters).  I've found, in the past, that peat-pots CAN wick soil moisture *away* from the plant if any portion of the peat pot is left exposed above soil level (YMMV - but that's been *my* experience).
  6. Interestingly enough, I'm finding that the babies I start in the bathroom windowsill DO seem to get a bit of a head-start over those that were started in the greenhouse.  I do have heat-mats under the flats in the greenhouse, but I think that - just because the temperature is ALWAYS warmer (and much more consistent) in the house, -the windowsill babies do better.  And once they're potted-up (and put on heat mats in the GH), they seem to do just fine...
  7. Oscillating fan is an awesome addition to the seed-starting ritual.  The constant air movement is good for the babies.  It makes 'em stronger AND keeps the soil surface from getting all yukky (and buggy)! But you definitely have to keep on top of watering (Daily!).
  8. Haven't had to utilize my "Old" Secret Weapon of spritzing the babies with chamomile tea (to prevent damping off).  Not sure why - but I'll take it! (And I still have my spritzy bottle of tea ready - just in case!)

Lastly...  In other (but still Garden-related) news:  Eggton (love her blog) posted an awesome-sounding recipe for white chili here.  Love-Love-Love this post because it hits on Weenie-Dog-Racing AND has a recipe for white chili! 

Well, immediately after reading that post, I ordered a BUNCH of white tomato seeds!

Mind you, I have NO idea where I'll find space for the actual PLANTS!

Some have been started in the bathroom window, and others have been started in the greenhouse.  The bathroom seedlings are kickin' @$$ and takin' names.  The greenhouse babies seem to be a bit slower with waking up...

* * * * *
Allllllllrighty then!  I think that makes up for 3 weeks of silence!  I'm freezing my butt off - out here at the Tiki Bar (no, it's not summer yet!), so I think I'll wrap this up and haul my carcass INSIDE where it's warm!

xoxo

-QT

Wednesday, October 10, 2012

PlantCam / Timelapse Cam Follow-up

I figured I'd share a few more thoughts (and pictures) of the Time-Lapse Camera Gee-Gaw - since it really is pretty cool!

First-up: Side-by-side Old and New (Old, dead one is green.  New, live one is black).


And here they are out of their boxes:


They have a tough, weatherproof exterior and they seem to seal-up pretty tight.  The old one made it thru several rainstorms without incident.  They both have a screw-ma-bobby hole on the bottom that enables them to be screwed onto any standard tripod.  They also come with brackets that can be mounted thru a lattice fence or on a sturdy garden stake.  The bracket has a corresponding screw-ma-bobby and adjustable angles and yada-yada.  Wingscapes also provides straps so you can strap the camera to a tree trunk.  All-told - you will be able to find a way to rig it up (just don't put it in a high-traffic, narrow-walkway, at shoulder height, like I did!).

Here are the cameras with the doors open:


You can click on the image to Biggify it.  All told, it's a pretty simple set-up.  There's a viewfinder ("Meh!"), a power button, a focus-ring (the flower-lookin' ring around the lens).  The old camera had a laser-aim (but it really was only marginally useful), and they both have light sensors (so you can set the camera to go on at first light) (again, that didn't work for me b/c of our motion-sensor lights and nocturnal neighborhood cats!).  The middle rectangle-screen is just a simple LCD.  You basically use the dialy-knob (bottom left) to pick your setting; then when you're in setup mode, you use the 5 "directional" buttons to navigate thru the menu selections.  It's fairly intuitive and SUPER simple.

Incidentally, this is not intended to be an instructional post (you can always go to Wingscapes for more info) on how to use the thing, but since my last post generated some questions, I figured I'd share a few more observations based on my (limited!) experience...

It uses 4 AA batteries (one set of alkalines lasted most of the summer: May - Aug) (over 1,100 jpgs).  Apparently, there's an AC Plug-in option, but I never bought the adapter - and I never needed it (I don't think I'd want to run an extension cord outdoors anyway).

It does need an SD card for storing pics - and if you're half as geeky as us, you've probably got dozens of cards laying around.  Otherwise, I think if you send back the Registration Card, Wingscapes will send you an SD card for free (Free is good!).

I used a 2-Gig in my old Plant-Cam and you saw the quality.  Not bad (Not great, but not bad).  I'm gonna bump-up to a 16-Gig b/c the new cam has HD capabilities.  Also: It looks like the new cam supports WiFi.  I haven't "RTFM" yet so not sure if that means it WiFi's the images directly to my laptop (which means my machine needs to be on all the time).  I think I'll prob'ly just stick with the SD card.  And now that I finally figured out the Movie-Maker software, it's ridiculously easy.

Price seems to have gone up a bit (no surprise), but Amazon's got it for $99.95 w/Free Super-Saver Shipping.  I do think it's a fun and cool gizmo.  The key is to find a good place to aim it (Finny Farm was a sucky spot, unfortunately).  It did pretty good with the "longer view" of last year's garden.

Honestly, I think the trickiest part of the PlantCam is finding a good place to put it.  The mounting stuff provided is excellent - that's not the problem.  

First up:  It's pretty difficult to "aim."  There is a little Viewfinder, but it really doesn't help much (especially if you are mounting the camera on a lattice fence and really can't fit your head behind it!).  And it's not like you can "aim it," let it take a few pictures, then view the output right away...  

(Well...  Wait a minute - maybe you can?!  But you'd have to be SUPER careful not to jar the camera.  I'm thinking Bolt it into position FIRMLY, let it take a days' worth of shots, then the next day *very carefully* open the door and remove the SD card to view the jpgs on your PC - just to confirm that it's aimed properly...)

So - up 'til now - it's been kind of a crap shoot!  I'm not sure if it will be easier or more difficult on smaller subjects; say, aiming the camera at a seed-tray to capture germination.  I think I'll experiment with that (I know, I think I said that last year, right?!).

I do like the broader selection of focus/distances with the new camera.  I bet a lot of folks were trying to do close-up seedling shots and getting fuzzy photos.  And they do provide a tape measure so you can accurately gauge the distance.

Secondly: In order to get a decent video, you need to be cognizant of where you're aiming it and what kind of background you'll have "competing" with your video.  In other words, trying to photograph my GREEN veggie garden under a GREEN tree with GREEN vines covering the fence in the background?  Ummm...  Yeah! (Obviously I am NOT an award-winning photographer!).  Think "Composition!" Duhhh!

Footnote to that: Don't aim the thing due-east (as I did last year!), or due-west (as I did this year!).  You'll end up dumping a LOT of shots because the sun is blaring straight into the camera at dawn/dusk.

And for something large, like a garden bed, you'll want to keep the camera further back so you can actually see the whole bed.  Last year's video was much better from that perspective: You could actually see the plants grow from seedlings and eventually fill the entire screen!

And, personally, I like having some kind of inanimate object IN the picture so there's a sense of continuity (plants do seem to "move" during time-lapse photography).  Last year, it was my Weenie-Dog Whirlygig  This year it was a garden stake.

Hmmm...  What else?  I set my camera to take pics at one-hour intervals starting at 8:00am and ending at 7:00pm.  You can probably get a "smoother" video by shortening the intervals to, say, 30 minutes.  You'll need to have a pretty big memory card for that, though...

I had actually tried to use the PlantCam, last year, to photograph my Plumerias coming into bloom.  Strapped it to a palm tree and set it at 15-minute intervals (since the bloom-time of Plumies is just a matter of days).  Unfortunately, I never got to complete that experiment due to some palm-tree-trimming action that practically annihilated my Plumeria tree (Ooops!).

Anyway, I think that's about it.  To summarize: Be aware of where you're placing your camera - for a big area, the further-back the better.  Don't aim it in a location where it's gonna get direct-into-the-lens-sun.  Don't put it someplace where it's likely to get bumped.  And have fun with it!

I really do like my PlantCam (even if it is a toy that requires a lot of patience!) and - as previously noted - I love any company that stands behind it's product...

HTH!


Tuesday, October 9, 2012

Finny Farm Garden Videos - and Kudos to Wingscapes!

Soooo...  A couple of Christmases ago, Beloved Hubs bought me a Plant-Cam.

And I used and "reviewed" it, last year, in this post.

And honestly, last year's video wasn't *too* terribly awful.  At least I'd rigged the thing up in a relatively good location so you could actually SEE the growth of the plants.  Although the "stringing-together" of the images, using the on-board software, was pretty labor-intensive...

This year, I decided to capture The Finny Farm in all her glory!  Unfortunately, the Finny Farm was tucked away in a corner that didn't lend itself well to time-lapse-video-capture.  I bolted the camera (using the included bracket) to the fence that covers the pool equipment.  But it was in a bad spot (narrow pathway between the plum-tree and pool equip't fence).  And I did a lousy job of "aiming" the camera.  I started-out being SUPER optimistic about how tall the Finny Farm 'Maters were gonna grow and I aimed the camera a little too high.

And then there was the whole "narrow walkway" thing to deal with - which resulted in the camera getting "bumped" several times thru the season. Ooooops!  And then there's the whole "angle of the sun" thing to consider (which didn't play well with the camera-to-garden-aimedness!)...  The Finny Farm just wasn't in a good location for filming. "Oh well, waddaya gonna do, right?!"

I did retain ONE valuable lesson from last year's experience:  I set the camera for an 8:00am-8:00pm schedule (rather than "on" when it detects light - since we've got a motion-sensor light out there, and about a bazillion neighborhood cats that frequent the side-yard at night!).

I also decided to forego the onboard "string-the-jpgs-together" program for video creation - not entirely by choice, mind you (more on that, later).  No, this year I downloaded a freebie video program called Windows Movie-Maker.  It's actually really cool because A) You're not limited to 360 jpgs per video and B) You can actually preview the pictures and C) *Easily* dump the ones you don't want included in your "movie."  D) It also has features for adding captions and narration (or music), but I wasn't feeling THAT inspired!

Okay, now that you've read all the "disclaimers" here are the Videos that I took of the Finny Farm! (Grab a cocktail, this might take awhile...  Or you can skip 'em, based on my commentary!)

Finny Farm I:  This was early in the season, May-June.  I was entirely too optimistic and aimed the camera too high to capture anything (other than the "Volunteer" Peach-Tree which ended up with inedible peaches anyway!)


Finny Farm II:  I'm not even sure why I'm posting this video!  This was after Hubs "bumped" the camera and re-aimed it more toward the greenhouse.  You can pretty-much just watch the neighbor's Passiflora Vine take over the roof of my greenhouse in this video!


Finny Farm III:  Camera got bumped again.  But at least you can see Brandy, the Yellow Brandywine kind-of outgrowing her cage on the left side of the video.  Again, this ain't gonna win any awards!


Finny Farm IV:  The shortest video.  Camera got bumped back to the inedible peach tree!


Finny Farm V: You can actually see tomatoes starting to ripen on the plant to the left (at around 0:30).  That was supposed to be Yellow Brandywine, but the 'maters got Blossom-End-Rot and they really don't look like Yellow Brandywines at all.  :::sigh:::


Anyhoooooo...  Even though the Finny Farm ended up being "A Flop" this year, the camera *did* perform admirably (under adverse conditions!).  

And I should note: I do not consider the "Floppyness" of the Finny Farm to be a shortcoming on Finny's part (not at all!).  Truth be told: I kinda fubar'd on the Bed-Setup this year.  See, I had actually REMOVED this bed entirely (this is where last year's Straw-Bale-FAIL-Bed experiment resided).  This year, we built a new raised-bed and I decided to fill-in the base of the new bed with partially-rotted straw, then top-it-off with bagged El Cheapo Home-Depot Soil.  

Even though I Tested and Amended (per the Finnyknits Method), I think what ended up happening was: between the crappy soil, and still-rotting straw, the beds were robbed of nutrients thru the growing season.  So I am taking full responsibility for the suckiness of this particular bed.  Had I broken-down and driven up to get a full truck-bed-full of Yummy Lyngso Soil, I suspect I would have harvested a heckuva lot more (the other two beds - which were filled with aforementioned Lyngso Soil - performed admirably this year.  Although it really wasn't a Banner Year for 'maters, in general...)

Okay, ANYWAAAAYYYY..  Back to the Plant-Cam - and my Kudos to Wingscapes, k??
So at the end of the growing season, right-around the time that I ripped out the Finny Farm, I took down the Plant-Cam.  I was pleased to see that it took over 1100 photos thru the growing season and was (honestly dreading the idea of) stringing the jpgs together into several 360-jpg time-lapse videos.  I managed to create one video when I got the "Low Battery" Warning.
  
Okay.  Shut down and install new batteries, right?

Welllll...  The camera died after that.  Booooo!!!  I kept pressing the Power button and - Nada!

No worries.  Everything's on an SD Card.  I'll just offload it onto my PC.  And, while I'm at it, I'll d/l the Owner's Manual and figure out how to fix it, right?

Well, long story short, I "got" from the Owner's Manual, that the third-party software (Windows Movie Maker) would be the best approach for stringing-together the jpgs and making a movie.  But - as far as "Troubleshooting" goes, the manual was not forthcoming with useful information.

Sooooo...  I went to their website www.wingscapes.com, and I snooped thru their "Support" pages and ultimately ended up with "Contact Us"/Customer Service.  I sent 'em a note explaining that I had gotten my Plant-Cam as a gift, a couple of Christmases ago "and I LOVE it!" blah-blah, but now it seems to have inexplicably died.  "I hit the Power Button but the LCD screen doesn't come on.  Don't know if it's the power-button or if the LCD screen is dead...  Can it be repaired?"

Well, lo and behold!  They responded within a day (or two - might've been the weekend).  They told me that my model of Plant-Cam had been discontinued, but that they would send me a NEW, UPGRADED model -  along with a pre-paid Shipping Label so that I can return my "dead" PlantCam - Free of Charge!

Now I have NO CLUE what the "warranty" is on these gizmos (couldn't find it on their webpage, nor in the manual).  I naturally assumed that - with my unit being a couple of years old - it MUST be out of warranty and I was fully prepared to pay *something* to have it repaired (not sure what my "pain threshold" was - but I was certainly willing to investigate it, right?!).  Anyway - the fact that they STAND BEHIND their product - and are willing to replace it so quickly, easily, and PAINLESSLY speaks WORLDS for their company, I think!

So a BIG HUGE THUMB'S-UP to Wingscapes and the Plant-Cam for having AMAZING Customer Service!!!

I received my new TimeLapse Cam 8.0 earlier this week.  I did a quick side-by-side comparison of Old vs -New.  The OLD camera had limited "focus ranges" (11"-17", 17"-3', and 3' to Infinity).  The NEW camera lets you dial-it-in more accurately (8", 9", 10", 11", 12", 14", 16", 18", 2', 2.5', 3', 4' and 8' to Infinity).  The OLD camera did have a "Laser Aim" feature - but it was only useful at dusk (or nighttime).  The NEW model doesn't have the Laser Aim, but it does offer High-Def and will accommodate a much larger SD card (16 Gig).

I think the rest of the camera (including the low-tech LCD "limited menu" GUI) remains the same.  But I am anxious to set-it-up for my soon-to-be-planted Fall Garden (I'll try a better location this time around) and give you a FULL review!

Anywaaaaayyyyy...  I just wanted to give a HUGE Thumb's-Up to Wingscapes for their AWESOME (and highly-unusual, these days!) Customer Service!

Yes, they sent me a free, upgraded Time-Lapse Cam - but I still consider this to be an "Unsolicited" Testimonial - given that we PAID for the first camera, k?  And they certainly weren't looking for a "testimonial" - they were merely exhibiting excellent customer service by standing behind their product!

More to come, I'm sure..............

Tuesday, July 10, 2012

Summer Ramblings and Backyard Ponderings...

Warning:  Rampant Rambling Ahead (I'm trying to avoid doing anything productive, k?!).  But there're pictures and Geeky Glee and Garden Ramblings ahead!

That said:  Let's proceed, shall we?
So, while the rest of the country has been sweating their collective @$$es off with record-breaking heat-waves, we here in California have been lamenting the pitiable LACK of summer weather!

I mean, it's been "pleasant" - don't get me wrong.  Mid-70's to mid-80's.  But nighttimes are downright chilly.  And the afternoon winds have been pretty suck-ish.  Kinda cuts into my "Laze-By-The-Tiki-Bar" Activities (which are VITAL to my sanity!).  Honestly?  I'm a mid-90's kinda gal.  I'm even good up to Triple-Digits 'cuz, well, "It's a Dry Heat!"

Srsly.  I visited good friend  and colleague, Joysey-K, in late-July/early-August one year.  Temps in the upper 90s with, like, 642% humidity ("Jeezus - people LIVE here?!!").  Whenever she asks me if I want to visit again I tell her "No.  If I wanna remember a Jersey Summer, I'll just plunge my face into the hot tub and attempt to inhale!"

Annnnywaaaayyyy...  As of TODAY we are starting to experience Summer!  Mid- to Upper-90's - YAY!  And it's early evening, and I'm still sitting outside in my shorts 'n tank top.  There's a light breeze (nice, actually), and I'm enjoying tunes and a Margarita at the Tiki Bar!

Speaking of Tunes:  I cannot BELIEVE that Joysey-K "scooped" me on something Techie-Related!  See, she called me and told me about how her brother had this cheap "Tablet" computer that he'd bought from Big Lots for $89.00, right?  And I kind of interrupted her and said "Oh, yeah - I've got one of those, too.  It's a total piece of sh*t!"

And honestly?  It is!  I mean: if you're looking for a portable computer (this was before I got my Netbook).  Yeah, they've got WiFi capabilities, but they are abysmally slow internet-wise.  I mostly used mine as an e-Reader for my Google Books - since the "Tablet" (Wannabee) was running an Android platform.  I have since switched-over to Kindle (but what-evah!).

Forget about Facebook - waaaay too slow.  And when I tried to hook-up with my Netflix account, it was a solid "No-Go!"

Well, after I finished b*tching, Joysey-K pointed out that her brother uses his as a Jumbo MP3 Player and Movie-Machine by transferring his files onto Monster-storage SD-Cards.

Well.  HELL!  Why didn't I think of that?!!  D'oh!

So then I spent an hour or two trying to figure out where the hell I'd stashed the damn thing!  Someplace Super-Safe, no doubt!  Cleaning various cabinets/closets/nooks - much to Joysey-K's Delight (She's a Clean-Freak!  She vacuums and dusts *FOR PLEASURE* people!!!).  I did, eventually find it.  And I did confirm that, yes, it WILL accommodate a Monster-Storage SD card.  I found an 8Gig card and proceeded to move MY ENTIRE MP3 Music Library to the SD card.  Then I found a 6' Audio-Cable and dragged it out to the Tiki Bar and hooked it up to our ersatz Bar Stereo: A marine stereo in a waterproof housing, sitting on the "sink" - and running to a couple of Tiki Toonz Speakers! (Actually - sounds awesome ever since Hubs rigged-up an external amp!).

This is soooooo cool because now I have my FULL music library - literally - at my fingertips.

Yep.  I don't even have to get off my lazy duff to change the music!

Way Cool Tiki Toonz Speakers!

So the "Tablet" (Wannabee) Computer is still a complete POS (as a computer).  But as an MP3 player?  It totally ROCKS (Literally, even!).

And I have Joysey-K to thank for the Advice!  Thanks!!!

In Other News:  I wandered out to the Garden this afternoon (although it appears my SOLID WEEK of being able to walk and function like a normal human being is coming to an end - OUCH!  Thankfully, I've got new Rx Meds to try - Yippy F**kin' Skippy!) (Jayzus!  One of the prescriptions costs over $400 Retail!  No Sh*t!!!)

Anyway...  I wandered back and spotted THIS!
It's Stephanie Stupice of the Finny Farm!
Why, I do believe she is ready to be harvested!!!

She was DELICIOUS!!!
(and kindly ignore the reptilian skin on my finger.  This is how it looks when I'm "feeling good!")
(I won't post pictures of how it looks when I'm feeling like sh*t!)

So then I turned my attention to the Santa Rosa Plum Tree.  Remember my Love/Hate Relationship?  Well, we are fast-approaching that "Hate" stage!  I'd posted on FB a couple of nights ago about how "Pitting plums is booooooring!" and one of my friends replied that she had been up 'til after midnight, the night before, peeling and pitting 52 CUPS of plums.  52 CUPS!!!  Jeeeez Loueeeeeze!  I was b*tching about 8 Cups!  I just can't imagine!

Well, I pretty-well filled up my Harvest Basket (which is ample!).  I drug it into the house and figured I oughtta weigh it, just for sh*ts 'n grins.  Had to use the bathroom scale!

Yes, there's a decimal on the scale.
Let's just call it 15 lbs, k?

Good Gawd!!!  "WTF am I gonna do with ALL THESE FRIGGIN' PLUMS????????"  And yes, there are more to be harvested still on the tree!!!

Rinsing 'em in the sink...

The plums are just gonna hafta wait because I've got OTHER fruits to deal with.  But I'm kinda thinking that this batch of plums is headed for the dehydrator because A) "Hubs needs his FIBER to stay 'Regular!'" (Ahh the joys of Modern Maturity!) and B) Dehydrating plums to make prunes is FAR less work than blanching/peeling/pitting to make jam! (Okay, mostly 'B!')

As for that other fruit???

Jam-bound!

Some of the "salvaged" peaches went in a paper bag with an apple and they do seem to have "mostly ripened."  I've also still got some leftover cherries, a few of my neighbor's apricots and - did I mention that I've got f**king plums?!! (So help me, if tomorrow's Farm-Share Delivery includes plums, I'll shoot myself!!!)

Anyway, I *should* be in the kitchen, right now, tending a potful of hot water on the stove and a separate bowlful of ice-water, blanching and peeling and pitting the peaches and plums (and maybe apricots - haven't decided if I'll peel 'em yet!).  But instead, I'm nursing a margarita and rockin' out at the Bar!  

Oh, and "rambling" about what I should-be doing (and probably WILL be doing - once the sun goes down!).  It's a form of "Motivational Therapy" k?!!

That's MY story, anyway!  And I'm stickin' to it!!!

To be fair, I have done Valuable Google Research to cobble-together a suitable "Mixed Fruit" Jam recipe.  And yes, I WILL post it - once I'm done!


View my page on Meet the Phlockers