Wednesday, December 25, 2013

'Twas a Crock Pot Christmas... Recipe: Lazy-Cheater Turkey Ala King (with a Holiday Twist!)

Hubs and I have been busy "sharing" a head-cold back-and-forth.  "Sharing is Caring" and all of that, right?!

On top of that, Hubs had some dental work done, recently, which is interfering with his ability to eat traditional holiday treats.  So my original idea of cooking a standing rib roast in the Big Easy outdoor cooker kinda got nixed.

So yeah, I'm sniffling and sneezing and - to be honest - I wasn't really relishing the idea of being chained to the kitchen for HOURS on Christmas day.  Hubs sounded rather dismayed when I announced that I wasn't planning on any kind of huge Holiday Feast, but I assured him that I would come up with *something!*

And *something* included a trip to Boston Market for a "Family Meal" of Turkey (+ sides), and a pre-cooked bone-in turkey breast from the grocery store (from the deli - near the hot rotisserie chickens).  I bought these items yesterday, and just kept 'em in the fridge for preparation on Christmas Day.

Here's what I came up with:

Turkey Ala King in the Crock Pot

QT's Lazy-Cheater Turkey ala King (with a Holiday Twist) over Patty Shells
Yield: I don't know yet, but probably enough for at least 4 people!
Update: This made a boatload of Turkey-Stewy-Stuff - Figure it'll serve 8+ (plan on 2-3 Patty-Shells, per person)

Ingredients:

  • Appx 25 oz. of turkey breast meat (I honestly didn't measure - but I used all of the meat from the "rotisserie" turkey and most of the meat from Boston Market* (kept a few slices for turkey sandwiches, later!).
  • 2 stalks of celery
  • 1 medium onion, finely chopped
  • 1 TBS extra virgin olive oil
  • 1 can of Cream of Chicken Soup
  • 1 can Cream of Celery Soup
  • 1 can Cream of Mushroom Soup
  • 1 can of Chicken (or Turkey) Gravy
  • dash or three of Bell's Turkey Seasoning (or whatever poultry seasoning you have - I'm partial to Bell's because it's heavy on sage and tastes like "Thanksgiving!")
  • 1/2 c Craisins (That's the "Holiday Twist!")
  • 1/4 cup cooking sherry
  • 1/4-1/2 cup heavy cream
  • 1 - 10 oz package frozen peas/corn
  • 2 packages Puffed Pastry Shells (or serve over rice or noodles)
*Notes on Boston Market - I don't know if it's "just me" or if their stuff really is super-salty!  I would be inclined to stick with low-sodium soups if I was using *just* Boston Market Turkey.  I still ended up adding 2 tsp of Splenda to cut-down on the saltiness of the sauce.

Instructions:

  1. I started by sauteing the chopped onion and celery, lightly, in olive oil - just enough to get 'em limp and translucent, then I plopped 'em into the crock pot.
  2. Then I chopped the turkey meat into 3/4" chunks, added that to the crock pot as well...
  3. Next, I dumped everything else - except for the cream and frozen veggies - into the crock pot and cooked it on low for ~2 hours.  Just enough to warm everything up - then I switched it to "Keep Warm" (since I really don't need to "cook" the meat any further!).  It sat there on "warm" for most of the day (I'd say roughly 3-4 hours), 'til we were ready for dinner (and THIS is why I love-love-love my crock pot!)
  4. Appx 30 minutes before serving, I will add the frozen veggies and cream, and switch the crock-pot to High while I bake the Patty Shells (Pepperidge Farm Puffed Pastry Shells from the freezer section of the store - near the pie crusts and Phyllo dough).


After that, we shall eat (hopefully I can snap a picture first!).  I think this will be a tasty meal - on it's own - but we've also got the Boston Market side-dishes to nosh on.

I'll report back later on...  After we've eaten!

Update: Dinner was delicious!  The Turkey Ala King was a good, tasty, stick-to-your-ribs kinda meal.  I might bump-up the Craisins to get a little more Holiday "Zing" next time - but overall, it was quite yummy!

Whoa! Two posts in one day?!  Merry Christmas!!!

Update (again!!) Dec 26:  Oh. Em. Gee!  Something amazing happened to the dish, after it spent the night in the fridge.  The flavors have melded so very nicely (which means I take-back the comment about adding more Craisins! It's totally not necessary!).  The only downside to eating it as leftovers - is that the peas and carrots have started to look like they've been cooked to death...

So - what adjustments would I make for next time?!  Ohhh, I think I'd do everything the same - making the King-Gloop a day early, but I wouldn't add the frozen peas/carrots or cream until just before serving.  So yeah, make the gloop a day early, refrigerate overnight, then re-heat (stove top or crock-pot) and add the froz veggies/cream 30 minutes before serving...

Annnnd...  Since we have an abundance of leftover gloop (and Hubs has an aversion to eating leftovers), I suspect there will be a Turkey Pot Pie in our future!


Happy Holidays! Recipe: Scrumptious (and EASY) Polish Golabki / Stuffed Cabbage in the Crock Pot

Heydy Hi There!

Wow.  Time sure flies, doesn't it?  I turned my back for 5 minutes and look at that - it's Christmas already!

I get weekly stats from - someplace?!  I dunno! - anyway, I get a weekly email that tells me how many "hits" this blog receives and - given the surge in page-views during the holidays - I can only assume that *somebody* is looking for recipe ideas!

And I have been really-really bad about adding new recipes to the blog.  OTOH, I haven't really come up with anything particularly Exciting and New, either.  In fact I, myself, relied on this very blog for our Thanksgiving Repast (love-love-LOVE Pioneer Woman's turkey brine - Ahhh-mazing!)

(And now I'm thinking "How cool would it be" for me to figure out how to link to a "printer-friendly" recipe hoo-haw..?  Yeah. Pretty cool, but......)

Okay, well, not gonna get all rambly today, but I DO want to post a new and exciting and ridiculously easy recipe that got RAVE reviews from the Spousal Unit.

I'd read some post on Facebook where somebody said something about having Cabbage Rolls on Christmas Eve.  Then somebody else replied that Cabbage Rolls for dinner was, like, their annual Christmas Tradition.

I guess we could try a new Christmas Tradition, right?

"Ohhhh Gooooooogle?!!!"

Here is where I started:  Cabbage Rolls II Recipe.

Image Credit: Allrecipes.com 

And here is what I ended up with:

QT's Golabki / Stuffed Cabbage Rolls in the Crock Pot
Yield: Appx a dozen cabbage rolls which should feed 3-4 people
(Although Hubbie scarfed-down 5 in one sitting!)

For the Cabbage Rolls:

  • 1 large-ish head of green cabbage - cored and lightly steamed
  • 1 lb extra-lean ground beef
  • 1/2 package Uncle Ben's Ready Rice - Butter and Garlic Flavor* 
  • 1 medium onion, finely minced
  • 1 (14.5 oz) can diced tomatoes (including juice)
  • 1 egg
  • appx 1/4-1/3 cup bread crumbs
  • 1 envelope Lipton "Recipe Secrets" Onion Mushroom Soup
  • 1 tsp Garlic powder
  • 1 TBS Worcestershire sauce

*I used the whole package (2 cups) of rice for the first batch.  It was waaaay too ricey!  1 cup should be plenty.  Oh, and you don't HAVE to use Uncle Ben's, specifically (I did - because I'm lazy and I had it on-hand!).  Any rice will do (Ooh - Rice-A-Roni, maybe?!) - just make sure it's cooked before you make the stuffing!

For the Sauce:
  • 2 (8 oz) cans tomato sauce
  • 2 TBS Splenda Brown Sugar Blend (or use regular brown sugar)
  • 2 TBS lemon juice
  • 1 TBS Worcestershire sauce
  • 1-2 TBS red wine vinegar
Instructions:

Cut the core out of the bottom of the cabbage and steam for appx 5 minutes.  Or you can attempt to remove the outer leaves and place them in boiling water for appx 2 minutes.  Basically, you want the leaves to be limp enough to wrap around the filling without tearing or breaking open.  I chose to steam the whole head - and it worked great.

Chop a medium onion (or use dried, chopped onion if you prefer).  

Dump everything - except the cabbage and sauce ingredients - into a large bowl and mix well.  I find it's best to use your hands, but you may find that's too gross!  Anyway, mix thoroughly.  Then scoop appx 1/4-1/3 cup of meat-rice mixture into each of your cabbage leaves.  Roll the cabbage leaves from the bottom, fold in the sides, and continue rolling 'til the stuffing is completely encased, burrito-like, in the cabbage leaf.  Put the roll directly into the crock pot (with the seam-side down).  Repeat til you have one layer of cabbage rolls in the bottom of your crock-pot.  Sprinkle lightly with sea salt (I used garlic sea-salt).

Keep making cabbage rolls and add a second layer in your crock pot.  Sprinkle with salt again...

Mix up all the sauce ingredients in a smaller bowl, or saucepan if you prefer (I didn't find it necessary to heat it - the sugar blended into the sauce just fine on it's own).  Pour the sauce over the cabbage rolls in the crock pot.  Cover and cook - Low for 8-9 hours or High for 5-6 hours

This is one of those recipes you can play around with.  Add or subtract ingredients as you see fit. But I think I'd definitely stick with Extra-Lean Ground Beef (otherwise, it'll be too greasy and gross).   I think the "key" to this recipe's success is the tangy-sweet tomato-y sauce so I wouldn't change much, there.  I doubled the sauce from the original recipe and that seemed like just the right amount.

Definitely a delicious meal that Hubbie raved on-and-on (and-on!) about.  Hubs is half-polish and I learned that Cabbage Rolls are also known as Pigs-in-a-blanket or Golabki (in Polish).  Turns out his mom and grandmother made this when he was a kid and - I'll be damned - turns out this recipe tastes almost exactly the same!

So Yay Me - and Yay for new Christmas Eve Traditions!

Hope ya'all are having a simply stupendous Holiday!  I am - and I may even have a few more recipes to post (Heyyyy!)

xoxo

-QT

Sunday, October 13, 2013

Bienvenida a Estados Unidos! (GGW 13)

Whoops.  Had to take a little side-trip there!

Just got back from sunny (well, sunny with occasional thunder-showers) Mexico.  Girls Gone Wild - 2013 Edition!

This trip was, pretty-much, a carbon-copy of last year's trip (in terms of where we went, what we saw, and what we drank - err - ate!), so I'll just link to last year's slide show post (which I never did figure out how to embed!!!)

Random Mexico Photos

Okay now, requisite disclaimer:  This is post is gonna be mostly-rambly. Consider yourself warned!

This year's trip was quite a bit different, in that it was something of an Emergency-Emotional-Support trip.

See, ever since Hubs and I went to visit them, and we discovered that Hubs really doesn't like the Mexican Ex-Pat Zone (Lake Chapala and surrounds), we girls decided that GGW Weekend needs to be an Annual Thing.  No Men Allowed is what I'm sayin'!

So the original plan for GGW Weekend (Maiden Voyage - 2012), was for the girls to ditch their spouses and spend a 4-5 day weekend catching up, perusing Artsy Fartsy zones, and yakking endlessly in Girl-Speak (mind-numbingly dull for the spousal units!).  In fact, last year, D's husband had flown back to the states - just so we girls could have our "Hen-Fest."

So this year's trip has been "cooking" since March (when I purchased the airfare).  In the meantime, D lost her husband most unexpectedly.  That was a total shock and major blow to D:  I mean, he was many years her senior - and plagued with (hereditary) cardio-vascular issues - but he was also the poster-child for good, clean, healthy living.  Seriously, he was like Mr. Iron-Man Triathlete, right?!  So, on his last day on earth, he awoke to watch the Tour de France.  Did his usual 100 push-ups and 100 crunches and - no doubt - ate a light healthy breakfast of fruit and granola (or something), then went on a 2-1/2 hour bike ride (Basically - just another normal day for them, right?).  Well, when he got home, D greeted him as he was walking his bike back into the house.  Next thing she knew, he was slumped-over, lips turned blue and in an instant - he was gone.  He died right in her arms.

I mean, it was as beautiful as something-like-that can be - but HOW TRAUMATIC!

In the weeks following his demise, D had been very busy handling legal affairs, estate settlements, planning "Send-off Parties" ("Celebrations of Life" whatever you wanna call 'em), in multiple countries/states (They were quite the "Movers and Shakers" - back in their busy-career days).

Through it all, she had many friends, neighbors - Gringos and Mexican nationals alike - offering her food, support, rides to wherever (and more-than-a-few scumbags of-the-male persuasion who actually "hit on her" at her late-husband's celebration - Urgh!) (She is incredibly gorgeous and, at age 50, she is comparatively young amongst the Ex-Pat population - therefore, quite a "catch" in her own right!).

Annnnnywaaaayyy...  Tactless Scumbags aside, she really does have a good support network down there - is what I'm sayin'.  But in the weeks after her husband's passing, she relied most heavily on daily phone-calls with her mother - back here in the states.  Welllll...  Just a few short weeks after her husband's death, her mother's health took a turn for the worse.  Her mom passed just 6 weeks after her husband.

So the "tone" of my upcoming Mexican Fiesta had changed significantly.  First, I wanted to confirm that it was still okay for me to impose upon her hospitality during this difficult time - to which she replied "Are you KIDDING ME?!  You are my beacon of hope!" (or words to that effect!)

So long-story-short (Too late!!!), much of the weekend was spent reminiscing about all of the good (and bad) times...  Many tears were shed...  There may have been a Complete Nuclear Meltdown at one point...  Then, a little bit of gentle "Butt-kicking" was in order (since my friend had found herself on a bit of a self-destructive path - understandable, given the circumstances).  Toward the end, there was definitely more laughter than tears, and I'd like to think I played a small role in getting her pointed back in the right direction.

And I feel good - for having had the opportunity to help a very good friend through a very rough patch.

Secondary to all of that: I feel good because - prior to my trip - I had gotten a steroid injection.  That, unfortunately, seems to be the only thing that kicks my skin condition to the curb.  Not really a viable long-term solution, but I'll take it for stuff like international vacations - just to ensure that I am able to walk and function like a normal person.

I'm rather enjoying this whole "normal" thing - now that I'm home.  I've actually been able to do crazy stuff like: "I think I'll check out the Saturday Farmer's Market" and just put on a pair of shoes (Yes, SHOES!), grab my car keys and go.  Or "Gee, we're out of milk" and - again - slip on some shoes, hop in the car and go.  Or, crazier still:  "I think I'll go out and tidy up the garden" (Gawd, that sounds so refined, doesn't it?!).  So I ripped out the last of the tomato plants and assorted summer veggies (left the pepper plants - they've still got some fruit that's almost ripe).  Filled the green-bin, I did!  And that is pretty damned cool if you ask me!!!

(Srsly - this really is a "treat" for me right now - to be able to walk without pain!)

Oh how I wish we (the doctors and me) could find a REAL solution to this completely f**ked-up condition!!!

Anyhoooo...  Sorry for the rambling, but I really wanted to take a minute to kind-of "count my blessings" - as it were.  Normally I absolutely HATE this time of year.  Autumn with it's shortened days, and cooler nights *always* brings me down!  But we are having an absolutely breathtakingly beautiful Indian Summer, this October (Jeez!! October already?!!).  I am up and walking - and I intend to squeeze every last micron of Vitamin D out of whatever sunshine we have left, right?!

And with that, I will add one picture of a couple of Talavera Planters that I picked up in Tonala, this last trip!


Adios!  And I hope to get back to posting bona fide "content" someday soon...!

Saturday, September 21, 2013

Recipe: Yogurt and QT's Ridiculously Easy Low-Sugar Vanilla Ice Cream

Yeah, so I'm at that awkward "I've been gone for so long... How do I start-up again?" stage...

I probably owe ya'all a Summer Garden Recap - but that was kind of anticlimactic (given the Spring-Seed-Starting Frenzy!).  But I'm not quite ready to post about that...

Ehh...  When all else fails, fall back on a cheesy recipe, right?!

So yeah, one of the things I started getting into, this past summer, was yogurt-making.  This was primarily because the dermatologist had put me on antibiotics, full-time.  Antibiotics, as I'm sure you're aware, kill all bacteria - even the "good bugs" in your stomach so, consequently, I've decided that it would be best to counteract that with probiotics  in the form of homemade yogurt.

Added bonus:  It gave me an opportunity to use-up some of the AMPLE low-sugar jams that I'd put-up last year!  Half cup of yogurt, couple of tablespoons of jam, and a teaspoon or two of sweetener (I've been using mainly Splenda) - makes for a tasty, (mostly) healthy treat...

So I bought a cheesy-cheap yogurt-maker from Groupon (no clue how long that link is good for, nor do I get any "kick-backs" if you happen to click on it).

The yogurt maker came with recipes.  Plus there's a ton of recipes on the 'net as well.  Basically all I've been doing is making plain yogurt from half-and-half + nonfat dry mik (for thickness), then flavoring with whatever SF Jams I excavate from the garage!

Plain Yogurt Recipe:
4 cups half-and-half
1/4-1/2 cup non-fat dry milk
Fresh yogurt culture*

*First Batch: 1/2 cup plain store-bought yogurt (with "live cultures" - check the label)
*Subsequent batches: Just use 1-2 TBS of plain yogurt from your last batch
*Optional: You can also add the contents of one tablet of Probiotic supplement

Mix the half-and-half + NF Dry milk with a whisk.  Heat the mixture to 185*F.  I've found it's easiest to nuke it in a glass pyrex measuring cup.  Appx 5 mins to start, then check the temp with a candy thermometer.  Keep nuking in 1 minute increments 'til the "milk" reaches 185*.  Then let it cool down til it's appx 110-120*F, then add the "starter culture." (store-bought - or use your last batch)

Pour the milk+yogurt mixture into your yogurt maker.  Plug it in and let it cook for appx 8-10 hours.  The longer you cook it, the "sourer" it gets - so it's a personal taste thing...

If it separates and gets liquidy on the top (even if it's a funky color), you can just stir it back in - after cooking time is complete.  Store, sealed, in the fridge.

Serve it by mixing your favorite fruit jam and adding sweetener, to taste...

Okay, so I made up a couple-three batches of yogurt.  It really is quite tasty - but was starting to get a little boring (I'm actually not a huge fan of yogurt - to be honest!).  So then I decided that, maybe, frozen yogurt might be a bit tastier.

I surfed online and found this on Amazon.  I actually do have an electric ice-cream maker in our storage shed, but it requires ice and salt and time and - besides - it's buried under camping equipment (and it makes much larger quantities than I need or want).  This li'l beasty - with it's 1.5 quart capacity - is perfect (since my yogurt-maker makes 1 quart at a time).  I also like that the "bowl" has freezer-gel inside of it.  Toss the bowl in the freezer and it's ready-to-roll whenever you wanna mix-up a batch of Fro-Yo or...  ICE CREAM!

Yep - You were wondering when I was gonna get to the Ice Cream part, huh?!

Alllllrighty then!  I am *almost* there!  My first couple of batches were actually peach Fro-Yo (Future Post:  2013 was "The Year of the Peaches" - to the point where I was actually having nightmares about harvesting peaches!).  I had some frozen "Peach-Spice Butter" out in the garage freezer.

I basically peeled/pitted a sh*tload of peaches and dumped 'em in the crock-pot with cinnamon, nutmeg and Splenda brown-sugar blend.  Cooked 'em down for several hours and pureed them using an immersion blender, then stuck the resulting gooze into plastic freezer containers.  So it ended up being 4 cups of yogurt + 1 cup of frozen peach-spice butter + a couple-three squirts of Toriani sugar-free peach syrup, all tossed into the ice-cream maker for 20-30 minutes.  Dee-lish!

And - well, I'm still experimenting with the whole Fro-Yo thing - so I'm not quite ready to start posting bona-fide recipes - yet.

But....  Since Beloved Hubs seems to suffer from Giaourtiophobia (Ooh!  New Scrabble Word!), and because I'd purchased a half-gallon of Manufacturer's Cream without checking the expiration date (it was expiring the next day - Oops!), I decided to whip-up a batch of low-sugar (but definitely NOT low-fat!) vanilla ice cream!

Cuisinart Ice-Cream/Fro-Yo Maker
(Yes, Crappy Droid Pic!)

Okay, so here is where I started:  Vanilla Ice Cream Recipe

And this is where I ended up:

QT's Ridiculously Easy Low-Sugar (but not low-fat) Vanilla Ice Cream
Yield - appx 9 @ 1/2 cup servings

Ingredients:
  • 2C Heavy Cream 
  • 2C Half-N-Half
  • 1T Vanilla
  • 1/4C granulated sugar
  • 1/4C granulated Splenda
  • 1 small pkg (1oz) sugar-free instant vanilla pudding 
Instructions: 
  1. Make sure the cream and half-n-half are well-chilled (stick the cartons in the back of your fridge).
  2. Combine vanilla, sweeteners and pudding mix into the half-n-half.  Whisk until well-blended.  Then add cream and stir it in.
  3. Pour the mix into a chilled ice-cream maker and let 'er rip for 20-30 mins (mine was done in appx 15, actually).
Super-Duper Creamy and delicious!  Recipe notes:  I was reading where folks were complaining that the recipe ended up being more like "butter" than ice-cream so that's why I am suggesting that the cream gets blended in LAST - and make sure it is super-chilled before doing so.  I didn't experience "butter" - but I figured I'd make mention of it...

I expect that I'll be doing a lot more experimentation with Fro-Yo - as well as Ice Cream.  And probably something incorporating protein shake mixes as well.  When I experience "successes" I will make an effort to post 'em here...

Cheers!

-QT


Wednesday, September 11, 2013

"I'm not dead!"

Warning:  No interesting "content" here - just a whole lot of rambling!  If you're looking for something useful, then "Move-along...  Nothing to see here!"
Ahhh...  When all else fails, you can always fall-back on Monty Python - amiright?!

Jeez, look at this place!  A bit dusty, wouldn't you say?  I simply *must* talk to the housekeepers about that!

Yeah, sorry for the hiaitus.  It actually wasn't planned - Quite the contrary!  I was rather looking forward to having a simply STUPENDOUS summer or - at the very least - an insanely productive Garden Season.

Sadly, it just didn't work out that way.  I kind-of had a somewhat Crap-Tastic Summer.  And - like my mama always told me - "If you can't say anything nice, don't say anything at all."  I think I've mentioned this before (on the outside chance you are a regular-reader here!), I want this to be my Happy Place to yak about gardening, and cooking, and canning, and "Wild Hairs" and funky projects, and artsy-fartsy stuff, and basically anything that brings a little happiness into my world.

Sadly, Old Age - and all of it's annoying accoutrements - seems to be rearing it's ugly head (and I don't remember ANY OF THIS being mentioned in the handbook - dammit!).  Between my beloved hubs - who had knee-replacement surgery earlier this year (and is now facing complete tooth-extraction - "Hello, False-Teeth-in-a-glass on the night-stand!")...  And then me with all of this irritating (and indescribably Itchy and Painful) skin condition bullsh*t...  Well, let's just say that I might have set my expectations just a leeeetle bit too high when it came to Summer's Glory.

:::sigh:::

I don't want to whine tooooo much here, so I'll try to keep it brief (HA!).  To be honest, hubbies TKR procedure when extremely well, and he is well on his way to a full recovery.  But my skin condition (which is NOT psoriasis - and the doctors reached this conclusion because.... [drum-roll please!]...  It doesn't respond to ANY psoriasis-treatments - HAYYY!!!), well, let's just say that my skin condition continues to plague me and *still* seems to NOT respond to ANY treatments WHATSO-F**KING-EVER!

After two (count 'em: TWO!) overnight stays at two different hospitals (First was our local E/R.  The second was Stanford Medical Center - because my dermatologist didn't know what else to do with me!), well, I think we FINALLY got my doctor's attention, anyway...

I really-really-really don't want to rant about this, here (Ohhhh, it is sooooo tempting!  But what good would it do?!  Nada!).  Anyway, the bottom line is: I have been, pretty-much, a shut-in ALL SUMMER LONG.  And by shut-in, I mean - sometimes I am in such miserable shape (read: PAIN) that I haven't even been able to walk out to the patio to water my plants, let-alone make my way back to the garden.  Canning? Fugeddaboudit!

Thankfully, we have awesome neighbors and friends who were willing to pitch in, when things were at their bleakest.  So there's THAT (Bright Side!!!)

So that is my lame (but honest) excuse for disappearing (and Thank You - O' Long-Time-Blog-Follower - for "checking up" on me!  I never realized I even *had* followers!  I know I've got 'readers' - but I suspect they are mostly Hit-And-Runs looking for recipes (Ironically, my '# of visitors' reports are higher since I've stopped posting - go figure!).

Anyway, I shall make an honest effort to spend a little more time here.  I'll start posting recipes again, and maybe throw-together some kinda Summer Recap (such as is!). And, lastly:


No Whining!!

"Talk" soon!

-QT

Saturday, April 27, 2013

Recipe: Apple Cranberry Walnut Pie (AKA "Best pie you ever made")

Apologies for the crappy Droid pic.
We dug into this bad-boy FAR too quickly for me to snap a good picture!

I haven't posted many recipes lately.  Mostly because I haven't been cooking much lately.  Fact is, I've been too busy getting dirty in the garden and/or just plain lazing outside and enjoying our AMAZINGLY good weather!

Anyhoooo...  I decided it was time to bake SOMETHING, and the apples were threatening to overtake my kitchen sooooo...  How 'bout Apple Pie?  I Googled a bit and got a few ideas...  Apple pie is good, but... What else can I add?  I ransacked the cupboards and found a couple of (partial) bags of glazed walnuts and Craisins and a jar of my home made Cranberry-apple Jam - Hey!!!  I Googled some more and - while I thought that 'Apple+Cranberry+Walnut+Pie' must be a New and Unique Flavor Combination - "Not so, Kemosabe!"

I found lots of Apple-Cranberry-Walnut "Cobbler" recipes. But I wanted Pie so this is what I came up with...

And, I should note, that Hubbie has declared that this is "The Best Pie you EVER made."  With a recommendation like that, how can you POSSIBLY go wrong???

QT's Cranberry Apple Walnut Pie
(with low-sugar substitutions noted)
Yield one 9" deep-dish pie

Ingredients:
  • Appx 2 lbs of tart baking apples (this worked out to roughly 6 medium-sized Granny Smiths for me)
  • Lemon Juice
  • Half-pint of Cranapple Jam (ver 1.0)  (or half-a-can of whole-berry cranberry sauce)
  • 1/4-1/2 cup dried cranberries
  • 1/2 cup glazed walnuts
  • 1/3 cup granulated sugar (or substitute Splenda or C&H Light*)
  • 1/3 cup dark brown sugar (or substitute Splenda Brown Sugar Blend*)
  • 1/2 tsp ground cinnamon
  • 1/4 tsp ground nutmeg
  • 2 TBS flour
  • 2 TBS butter, softened
  • crusts for 9" two-crust deep-dish pie
  • 1 egg white (optional)
  • Coarse granulated sugar (optional)
Instructions:
  1. Preheat oven to 425*
  2. Wash, peel, core and chop the apples into 1/2" chunks (appx)
  3. Drizzle a little lemon juice on top of the apples as you're chopping and dumping them into a large bowl (keeps 'em from browning)
  4. Dump in a jar of Cranberry Apple Jam.  Or, if you don't have jam (and I realize you may not!), you can increase the quantity of apples and/or dried cranberries. Orrrr you could toss in  half a can of store-bought cranberry sauce (:::GASP:::) and increase the spices accordingly...
  5. Dump in your dried cranberries and glazed walnuts (mine were store-bought from the produce aisle: I found a couple of brands: Fresh Express or Emerald) (Or I'm sure you can find a recipe for glazed Walnuts if you ask Google nicely!)
  6. Add sugar, spices and flour.  Mix gently until everything is well-coated.  Give it a taste and adjust as you see fit!
  7. Pile the pie-filling into the bottom crust (Yep, I'm still using frozen pre-made crusts).  Mound it up in the center.  Cut up your butter and blorp a few blops on top of the filling.
  8. Moisten the edge of the bottom crust with your finger, dipped in water.  Unroll the top crust and place it on top.  Trim and crimp the pie crusts together.  Cut a vent hole and a few slits in the top.
  9. Optional: If you want a shiny sprinkly crust: Whisk an egg-white with about a TBS of water and brush it on top of the crust (do not cover the vent holes or slits), then sprinkle with coarse granulated sugar.
  10. Bake at 425* for appx 30 minutes, then reduce temperature to 375 and bake for an additional 15-20 minutes or until golden brown**.
  11. Allow to cool a bit before serving.
*Notes on using sugar substitutes:  Like jam, I find that pies "perform" much better if you've got at least some sugar in it - otherwise it doesn't have the right texture (I'm not fond of "soupy" pies!).  I generally try to cut-back to roughly 1/3 of what the original recipe called for (in "real" sugar), and then "fill-in" with granulated Splenda or Stevia. And I almost-never end-up with the same quantity of sweetener than what the original recipe called for (but I don't like Super-Sweet stuff).

**Notes on baking times:  I use a microwave/convection combo oven, so your cooking times/temps may vary (but probably not by much - to be honest!).  Just keep an eye on your pie is all I'm sayin'!

Final notes on this recipe (in general), this is one of those instances where I was tossing things together and not necessarily paying SUPER close attention to what I was doing.  Then, I scribbled my notes down, from memory, afterward.  In other words: Consider some of these measurements to be "approximate." (i.e. the original-original apple pie recipe I started with called for 3# of apples - which was  waaaaay too much, so I "guesstimated" it down.  And I still have a plastic container of pie-guts in the fridge!).  Feel free to adjust as needed!

I plan to make this pie again, next week, when my Aunt comes to visit.  Next time, I'll pay closer attention and write it down as I go! (Heck, maybe even take a better picture of it next time - HEY!)

Pie in the oven
I got CRAZY with mounding the fruit in the center and it barely even goozed!

And yes, it was AMAZINGLY delicious!


Tuesday, April 23, 2013

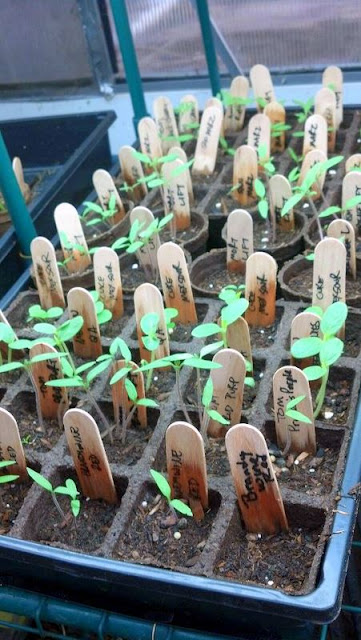
Seedling Madness - Pictures!

Seedling population got reduced by half today...

Here are the pictures - before the "Mini-Master-Gardener's-Sale!"

Note to self: Vining plants with swirly tendrils should NOT be grown right next to tomatoes!

I don't think we planted enough tomatoes!

Drowning in maters!

Divvying up the spoils!


Monday, April 22, 2013

It's Official: I am Sick of Seedlings!

So much so, in fact, I don't even feel like posting pictures!

Suffice it to say, the vast majority of them did extremely well.  I think I ended up with over 100 x 3" square pots of Veggie Seedlings.  I'll post the final tally after Friend-P and I get together and divvy them up.

So, for about the last 2-3 weeks, the babies got moved outside full-time.  They're still in their little pots in seedling flats, and they still need daily watering.  There were a couple of nights where temps dipped back into the 40's (and Finnyknits aka Indie-Farms posted a warning on Facebook - Thanks Finny!) so on those nights, they got dragged back into the greenhouse...

No more!  I am sick to death of dragging seedling flats in and out of the greenhouse twice daily!

In the meantime, the raised beds have been Tested and Amended.  I'm just waiting for the temps to TRULY stabilize, and the soil to warm-up, before I stick 'em in the ground.  And, of course, I have WAY more seedlings than I have real estate - so I'll be pawning some off on friends and neighbors.  And whatever I don't give away...?  Well, I'm thinkin' "Garage Sale!" - post some signs over near Home Depot and see if I can't "downsize" a bit!!!

And I think I've pretty-much decided that yes, I am going to do this again next year - only I'm going to focus on more quantity and fewer varieties - with the express intention of selling them in springtime.  I actually really did enjoy the "Hang-Out in the Greenhouse" aspects of seed-starting back in February-March - ANYTHING to get me out of the house, right?!

Another Crazy Idea - which I have shared with Friend-P since she is a Woman of Action - maybe we'll start some 6-pack assortments of herbs for a "Windowsill Herb Garden."  And maybe make some nice hand-built ceramic pots for growing said Windowsill Herb Garden.  Seems like a nice Mother's Day Gift kind of idea...

Anyhoooooo...  I know it's been awhile since I checked-in here - so I figured I'd scribble a quick post so you wouldn't think I'd died or anything!!!  For now, I am going to sit here, enjoying the 90* temps (Yayyyy!!!!!), sipping a margarita at our brandy new (just-like-the-old-one-only-newer) Tiki Bar....

Me = Happy :-D


Saturday, March 30, 2013

It's T & A Time!!!

T&A! T&A! T&A!

No, not T*ts and @$$, you perv!  Test & Amend!  Yayyy!!!

Doesn't sound too exciting?  Welllll...............................

If you want results like this:


And this:

Or maybe like this:

And this:

And, of course, who can resist this?!

Mmmmm :::drool:::

If you want to experience the above, firsthand, well you're gonna have to do this:


I first blathered about it here...  Or, you can skip my blathering, scroll down to the bottom of that post and find the links to Finnyknits' (aka Indie-Farms) blog where she explains Soil Testing and Organic Amendments very clearly and all scientific-like.

Feed your soil - and it will feed your plants!

So, if you're a South Bay Gardener - Run!  Do not walk to your nearest Garden Supply Store and buy yourself a Soil Test Kit.  Do it NOW - before the warm weather truly hits!!!


Sunday, March 24, 2013

More Gardening Madness and Bonus Bee Story!

So yeah...  Been bizzy-bizzy-bizzy this past week or so!

Friday afternoon, I granted myself a little "Comp Time" from work and logged-out an hour early so I could drive up to San Mateo for the annual San Francisco Flower and Garden Show.  It's an Annual Thing - kinda like one of those "Rites of Spring."  I feel like, if I missed it, it wouldn't *really* be Springtime!

Springtime?!

Why yes please!  And thank you!! :-D

The Garden Show actually doesn't change a whole heckuva lot.  Of course, the displays change - but it still seems like the same thing year-after-year - and I wouldn't miss it for the world!

I took a bunch of pics with my Droid while I was there but, unfortunately, none of 'em were particularly post-worthy.

Nevertheless, I did enjoy perusing the vendor booths and stealing getting inspiration for different types of ceramic garden art.  They had all kinds of cool stuff - from ceramic wind-chimes, to bird-houses, to funky brightly-colored ceramic sculptures that could be threaded onto a tall length of rebar.  I'm kind of thinking I need to make a sandworm (a la Beetlejuice) to slither and tunnel through my veggie beds!

I did make a couple of smallish purchases:  A new "not-so-deep" harvest basket, a metal duck sculpture, and a few tiny succulent plants.  I showed GREAT RESTRAINT in the Plant Vendor Zone - and I even walked past Love Apple Farms' booth without stopping! (Trust me - with appx 130 seedlings in the greenhouse - I do NOT need to purchase any more tomato plants!!!).

Rusty the Duck, guarding my veggie beds

I also purchased a new garden apron - but not at the Garden Show, actually.  I bought myself a Roo Garden Apron (online) and I absolutely LOVE it!  I'll admit, I was a little dubious about the "One Size Fits All" claim.  I am most definitely an ample person (and not at all by choice!).  I am happy to report that yes, indeed, for the Roo Garden Apron - it really is One Size Fits All!

Nope.  No spliff.  I just genuinely like the apron.  In fact, just for grins yesterday, I stuck one of the dogs into the Roo-Pouch/Pocket thingie.  Dog weighs appx 13# and - while she didn't like it - it wasn't at all uncomfortable walking around with the apron carrying a 13# dog!  I especially like all the pockets in it (like for your cell phone, or a pen, or shears, or whatevers).  

Let's see, what-else, what-else, what-else?!  Gawd, there's been a lot going on and I don't want to get too rambly!  

Let's just focus on the Garden Seedlings then...........

First bit o' drama was the sudden realization that as the plants get potted-up, the amt of available space in my greenhouse shrinks exponentially!  I needed more pots and more flats.  I'd found the pots on eBay, and I found several online sources for seedling flats - but shipping was "Are you freaking kidding me?!!"  Well, as luck would have it, we've got a Hydroponic Supply Store nearby, Rasa Hydroponics.  They have a nice selection of seed-starting supplies (including soil organic amendments), including 3" square pots and flats - competitively priced even!  So I am all set!

Today's photographic updates:

Getting ready to Get Dirty!
Roo Garden Apron and my spiffy new harvest basket

In the course of potting up, I did discover a few plants that seem to be suffering from damping-off.
I dragged out the spritzy bottle of chamomile tea - maybe they'll bounce back.

More potting up...  The entire lower-shelf is covered with flats, and I'm moving up to a second shelf.
I have added another 4' light fixture (So 2 x 2' Grow lights + 2 x 4' Grow lights!)

My first Zucchini is finding a new home!

Sooooo...  In a nutshell...  I started out with 131 mini potlets of seedlings.  I was actually forced to create a spreadsheet to keep track of 'em all (AAAACCCCKKKK!!).  4 never sprouted and got tossed.  As of now, 78 have been potted-up with 49 remaining.

I have two flats (cucurbits and tomatoes) that are currently cycling in and out of the greenhouse.  Out in the sun during the day, then back in the greenhouse at night...  Starting tomorrow, I think that's going to become 4 flats that cycle in and out (and I haven't quite figured out where they're all gonna go!).


Making a batch of Buckaroo Worm-Poo-Stew
For foliar feeding...

Annnnnnd...  I started a batch o Worm Poo Stew (aka Worm-Casting Tea), as per Indie-Farms recommendation.  I wandered a little off-course and decided to dump my worm-poop into a pouch made from old pantyhose (I don't want to strain it later!).  I'll let it steep in the bucket for a day or two, then put it in a spritzy bottle and spray the plants.

Next up:  The Annual Test-And-Amend Ritual (I'll start that next week).

Annnnnd...  A mini-update to the Bee Saga (which I never finished, but it seems like the story refuses to end!!!).  Here's a preview:

That is a bona-fide SWARM!

Okay, that's enough for today!  Happy Gardening!!!!!!!!!!!!!!

xoxo

-QT

Sunday, March 17, 2013

March Madness! No, not B-Ball, but GARDENING!

Holy smokes!  It's been awhile, huh?!

Truth be told, I've been BUSY.  Sometimes in a good way.  Other times, not so good!  But let's focus on the GOOD, shall we?!

The greenhouse has been a very fun and productive place to hang out!  You may recall that last month, I started yammering about seed-starting in the greenhouse.

So how's that going?

Ohhhhhh....  Pretty well, I'd have to say!

Okay, this is a Burpee Super-Sauce 'Mater I started my "Old Way"
Jiffy Peat Pellets in the bathroom windowsill

Assorted Melons, Squashes, Cukes and Zucchs 
Already ready for potting-up (March 10)

Babies are growing like mad!
(March 12)

Friend P heard about my Seed-Starting Adventure and convinced me to share some shelf space!
P's babies started March 1.  This picture was taken on March 15.

My lonely Super-Sauce 'Mater (the bathroom seedling)
Doing surprisingly well (and way ahead of my other maters, actually).
Potted-up on March 16

Ordered 150 cheap blown-plastic pots off of eBay
Jeez, I hope that's enough!!!

We've been getting some halfway-decent weather so the first batch of potted-up babies got to spend the afternoon working on their tan!

All of the babies, tucked-in for the night!

Germination rate, overall, has been pretty good (except for the some of the older seeds).  And I figure I'll plan on taking inventory and potting-up, as needed, on a weekly basis.  

I wander out to the greenhouse, twice a day.  First to open it up in the morning (otherwise it gets too bloody hot in there!).  Then again in the afternoon to "bond" with 'em.  Watering, adjusting lights, and just checking on their general welfare before I "put 'em to bed" every evening.  So far, so good!

Today I tackled a few smallish garden chores: 

Broccoli and cauliflower have bolted.
"Buh-bye!"

Two raised beds are "mostly cleared" (I even weeded!)
Cabbage, garlic and artichoke get to stay!

Former-Finny-Farm gets to stay - for now.
This bed is "mostly shade" right now...

EasyBloom Plant Sensor

This is a Geeky Garden Gizmo that Hubs bought for me a few years ago.  It's used to track sunlight, air temperatures and soil moisture. Newer models also track soil fertility (but I don't think I would trust that).  You "supposedly" can download the readings to your computer by plugging it into a USB port.  Sadly, I cannot recommend this product because I can't seem to get it to work with ANY of my PC's (Yes, I've downloaded the latest software/drivers) (and my inquiry to Customer Support went unanswered).  "Oh, well!"

I did manage to get it to work ONCE - after I'd left the sensor in the Finny Farm Bed for a week.  It confirmed that the bed doesn't get enough sun for tomatoes.  But when I went to use it again in "Recommend Mode" (where it gathers data and offers recommendations for plants that *would* grow in your specific conditions), well...  It just keeps giving me wonky error messages (PC doesn't recognize the sensor when it's plugged into the USB).

So yeah, save your money!  

* * * * *
Random Observations on Seed-Starting:
  1. It's a heckuva lot more time-consuming than I thought it would be! Not a complaint - just an observation!
  2. It's only gonna get worse after everybody's potted up and has to come out/go back in the GH daily for "hardening off."
  3. You need to do math!  I started with appx 33 Peat-Pots per flat.  Well, when the babies start to get their first "true leaves" you need to pot them up.  33 Peat Pots per flat vs 18 x 3" pots per flat means I need a lot more flats than I have (and - obv - I had to order a bunch of cheap pots, too! See above!)
  4. Need LOTS of adjustable lights.  I have my 4' Hydrofarm Grow light hanging appx 3" above the plants.  On the upper shelf, I also have my old 2' Hydrofarm Grow light fixture resting on the upper shelf (so maybe 8" above the plants?), annnnnd I have an old Aero-Garden Hood also resting on the upper shelf.  This *just* covers 4 flats.  Gawd help me when potting-up is complete and I have to start using multiple shelf-levels! (I think I'll be purchasing another cheap 4' fluorescent light fixture from Home Depot and rigging it up with more grow-lights).
  5. Peat-pots:  Jury's still out on those.  It just happened that I had ordered a bunch of 'em on eBay, so that's what I used (along with peat-based "seed-starting" medium).  I like that you can start the seeds and pot-them-up without disturbing the roots.  I do end-up tearing-off the top 1/3 of the peat-pot when I transplant into larger plastic pots - plus I try to plant them deeper (especially the 'maters).  I've found, in the past, that peat-pots CAN wick soil moisture *away* from the plant if any portion of the peat pot is left exposed above soil level (YMMV - but that's been *my* experience).
  6. Interestingly enough, I'm finding that the babies I start in the bathroom windowsill DO seem to get a bit of a head-start over those that were started in the greenhouse.  I do have heat-mats under the flats in the greenhouse, but I think that - just because the temperature is ALWAYS warmer (and much more consistent) in the house, -the windowsill babies do better.  And once they're potted-up (and put on heat mats in the GH), they seem to do just fine...
  7. Oscillating fan is an awesome addition to the seed-starting ritual.  The constant air movement is good for the babies.  It makes 'em stronger AND keeps the soil surface from getting all yukky (and buggy)! But you definitely have to keep on top of watering (Daily!).
  8. Haven't had to utilize my "Old" Secret Weapon of spritzing the babies with chamomile tea (to prevent damping off).  Not sure why - but I'll take it! (And I still have my spritzy bottle of tea ready - just in case!)

Lastly...  In other (but still Garden-related) news:  Eggton (love her blog) posted an awesome-sounding recipe for white chili here.  Love-Love-Love this post because it hits on Weenie-Dog-Racing AND has a recipe for white chili! 

Well, immediately after reading that post, I ordered a BUNCH of white tomato seeds!

Mind you, I have NO idea where I'll find space for the actual PLANTS!

Some have been started in the bathroom window, and others have been started in the greenhouse.  The bathroom seedlings are kickin' @$$ and takin' names.  The greenhouse babies seem to be a bit slower with waking up...

* * * * *
Allllllllrighty then!  I think that makes up for 3 weeks of silence!  I'm freezing my butt off - out here at the Tiki Bar (no, it's not summer yet!), so I think I'll wrap this up and haul my carcass INSIDE where it's warm!

xoxo

-QT

Tuesday, February 26, 2013

And now for something completely different...

No reason, other than I wanted to get these pictures posted and linkable!

Highway Wiener Nationals - 2007

Click to enlarge
Tazz "The Spazz" is in the #5 position (and took a commanding lead!)
Princess Annie is #6 (and I don't think she even budged!)

Close-up!

Tazz won her heat and took fourth, overall, out of (I'm guessing) several hundred dogs!

And what did we win (besides Bragging Rights)?

Burglars Beware - or - "Watch Your Ankles!"

Awesome times!

The following year, we didn't do so well.  Tazz made it to the finish line - and beyond!!!  Either her vision was starting to go and she just-plain didn't see me (that's a distinct possibility), or she was just so excited she ran right past me and into the crowd!

Sadly, after two back surgeries, Tazz's racing days are over.  And Annie and Dynah are just too lazy slow for racing!

And in related news:  If you're even remotely into Weenie Dogs, this movie is absolutely HYSTERICAL!

Wiener Takes All

Here is a trailer:

OTOH - If you aren't into Weenie Dogs, you'll probably shake your head and wonder what the hell is wrong with people! ;-)

Enjoy!

Edit: Ooh, I Googled 2007 Wiener Nationals and - aside from getting the Wienerschnitzel Competition - I did find one more photos of my girls!

Tazz and Dynah, and an unidentified onlooker!
Image Credit: westbaybanjo on Flickr

Sunday, February 24, 2013

So how are those seedlings coming along?

I'm so glad you asked!

Two trays full!


I'd say it's going pretty well!

So at this point, I have added a hanging adjustable fluorescent light fixture like this one:
Image Credit: Amazon
This is the 2-foot model.  I think I may need to upgrade to the 4'!

And I also bought an inexpensive oscillating fan like thus:


Again, image credit to Amazon

Annnnnd...  I've got both rigged-up to an Aquarium Timer:


Yep, Amazon again!

Hell, I oughtta figure out how to become an Amazon Affiliate - given how many links I post back to them!  But no, I get no spliff for sharing.  I just really-really like Amazon (And I love-love-love Amazon Prime.  Free FAST shipping! :-)

So anyway...  I've got the light fixture rigged up so it's hanging just a few inches above the seedlings.  And both the lights and the fan are set to run from 6:00am to 6:00pm.  The lights will help the seedlings grow strong and not have to "stretch" for light. Yes, they are in the greenhouse - but the greenhouse is covered with 60% shade-cloth.  It is fairly bright on it's own - just not bright enough - and if I removed the shade cloth, it would positively roast in there on sunny days.  

The fan is aimed mostly at the seedlings, but it does oscillate.  Finny told me that the fan will also help the babies grow stronger stems, plus the constant air-flow *should* help with deterring critters (white flies, aphids) and keep the soil surface from getting fuzzy/moldy.  The flip-side to that is, I *have* to go check the babies every day because they do tend to dry out a lot faster.

Okay...  Notes/Observations on germination:  I'm not experiencing 100% germination - but I have to admit that some of my seeds were pretty old.  So, it looks like (once again!), no Luffas or Birdhouse Gourds.  Most of the tomato seeds were pretty fresh, though - and I am surprised (and disappointed) to see that none of my Burpee "Super-Sauce" tomatoes have sprouted yet (that's one of the FEW seed varieties that actually I purchased this year).  Luckily, my friend DV says she ordered an extra Super-Sauce Tomato Plant from Burpee, so I suspect we'll be doing some trading in the weeks to come!

So yeah.  Babies are coming along - and I think (hope) it's not too late for more seeds to decide to come to life!

And in other gardening news:  Yep, I'm still harvesting cool-season stuff!

Yummmmmm!!!

Beds have been uncovered now (Yay!), but I still keep getting these @#$% "Extreme Cold Alert" emails from Weather Channel (which means I keep having to run out and re-cover the Plumerias!)

Annnnnd...  I've already started amending my beds with bagged steer manure and Bumper Crop soil amendments.

Wake-up! Wake-up! Wake-up!!!
Yep - definitely a hint of Spring in the air!!!

Finny-Farm Bed.  
At this time of year, it doesn't get full-sun (it's tucked between my studio and greenhouse).
My Brassicas are very happy!

Don't they look happy?!!

I haven't started my Test-And-Amend Ritual yet (Soon!  Very soon!), but I think we're on-track for an awesome Gardening Season!

Oh, and in other Gardening News: I have a Cordyline Addiction!

It started out with Cordyline fruticosa - which is a tropical variety (currently residing in my greenhouse)

"Wahhh!  I wanna live IN the house!"

This is what it's supposed to look like:
And it will - once I find a suitable location for it!

And here are my latest additions to my Cordyline Addiction:
Clockwise from rear:
Large bronze Cordyline australis
Small black Cordyline "Renegade"
Small Cordyline "Electric Pink"

These three plants ARE suitable for our climate (unlike C. fruticosa who is truly tropical).  So they'll live on the patio year-round...

I've already potted-up the large bronze one, into a large (tree-sized) pot.  I plan to pot-up the rest of them in smaller ceramic pots and finding a nice place to group them together on the patio...

I ALSO decided that the outer perimeter of our yard needs some sprucing up.  We've got huge Italian Cypresses running along the fence-line and, over the years, I've tried to add different ground-cover type plants.  My favorite, so far, are the African Daisies (Osteospermum something-or-other).  The foliage fills-in nicely, but the flowers only bloom in early spring (Which is fine.  Daisies aren't exactly Tropical!).  

Over time, I've tried adding more plants to the perimeter (with varying degrees of success).  Unfortunately, the perimeter is a *very* long run, and our drip-system is pretty-well maxed-out.  But I've stuck different types of palm trees out there (slow-growers like Pygmy Date Palms), and back along the far-far-back fence, I planted Agapanthus - hoping they would multiply and fill-in all the bare-dirt along the berm.  No such luck!

Sooooo...  While we were visiting some of Hubs' relatives, last year, in the Inland Empire (think super-hot and droughty So-Cal conditions), I noticed that they were using smallish ferns as ground-cover around their pool.  It looked positively awesome, so I asked about them (since I always considered ferns to be Shade-Lovers).  They told me that they were Sword Ferns and they seemed to do quite well with minimal water and full-sun.

I figure - in spite of the fact that I WANT to believe that Spring has Sprung - there's gonna be quite a bit more rain in the weeks/months to come, and THIS is when I should be planting stuff - if I want it to stand any chance of survival! I am NOT dragging a hose OVER the pool and ALL AROUND the perimeter of our yard (to be honest, I don't know if our hose is even long enough to make it to the far back fence!).

So I went online and researched "Sun and drought tolerant ferns."  Found this site - which was awesome!  Yup.  Seems like Sword Fern is the way to go!  I checked Home Depot (they had ONE in stock!), as well as our local nursery (which would have been grossly overpriced - if they had 'em!).  I ended up surfing online and discovered that I could either purchase 15 bare-root ferns for appx $90.00...  Or if I went to their "wholesale" site (same site!), I could buy 100 bare-root ferns for less than $80.00!

Yes, it IS madness, but I bought 100 ferns!  And honestly, I could probably put them all to use (our yard is that big!).  But I am really hoping that they are SMALL plants, so I only have to dig 100 SMALL holes, right?!

Besides, whatever I don't plant, I am SURE I can pawn-off on friends and neighbors!

Okay then...  I think that post was PLENTY Rambly!


View my page on Meet the Phlockers