Sunday, February 9, 2014

Less Rambling, More RECIPES: Garlicky Chicken Soup

This weekend, Hubs thought he was coming down with a bug.  So I bought him some fresh-squeezed OJ from the Farmer's Market (Yesss!!  I am sticking with my Non-Resolution for 2014!), and I also made him a Vat o' Chicken Soup (which, as we all know, cures EVERYTHING).  I added a bunch of garlic, too...

Here's a Quickie Post ('cause my cousin, a FB Friend, asked for the recipe - which was an "Oh sh*t, I'm cleaning out the fridge and I can't remember EXACTLY what I did!" - so take this with the requisite grain of salt, k?  Bottom Line: YMMV!)


QT's Garlicky Chicken Soup - with Spinach Ravioli
Yield: a Big vat o' soup! (appx 3.5 qts +/-)


  • 1 whole garlic rotisserie chicken (from the grocery store deli)
  • 4 stalks of celery, chopped
  • 1/2 medium yellow onion, chopped
  • 4 medium carrots, chopped into 1" chunks
  • 1 leek, sliced into skinny O's (only the white and light green parts)
  • 2-3 cloves of minced, fresh garlic
  • appx 3 big lacinato kale leaves (remove the white center stem, then chop the leaves) (these are optional, btw)
  • small bunch of fresh spinach, chopped
  • 1/2-1 cup fresh white mushrooms, sliced
  • 32 oz carton of chicken stock (low sodium)
  • 1/2 jar of prepared marinara sauce (mine was just the store-brand "Tomato, Onion and Garlic" flavored)
  • (or I've also just used a can of "Italian Style" stewed tomatoes when I don't have spag-sauce handy)
  • 1 (10 oz?) can condensed cream of chicken soup
  • appx 3 cups water
  • 1-2 servings (cubes, whatevers) of chicken bouillon
  • 1 package pre-made spinach ravioli (from the 'frigerated section of the store)
  • Seasoning salt (I used Montreal Chicken Seasoning, and some garlic-based seasoning salt - and I added a few add'l shakes of straight garlic powder).
  • 2 bay leaves
  • 2-3 sprigs fresh thyme (or use dried if that's all you have)
Instructions:
  1. Saute veggies in olive oil (I used Garlic-infused EVOO) in order of needs-cookingness. Onions, garlic, celery and carrots first. Stir over medium-low heat 'til onions are limp and translucent. Then add kale and spinach and let 'em limpify too. Mushrooms go in last - and here's where you start adding your seasonings.
  2. Add chicken stock and as it starts heating up, start discombobulating your rotisserie chicken. Toss the skin, bones and other icky bits. You can chop it into bite sized pieces if you like - but the chicken kind of ended up disintegrating on it's own as the soup cooked.
  3. I slowly brought the pot to a boil, then turned it down to simmer. I added the marinara, cream of chicken, water and bouillon at this stage (it was kind of a taste and tweak game at this point). All told, I think I let it simmer about an hour.
This soup was pretty-damn-good. and *should* cure whatever ails ya!  Give it a try and let me know what you think, k?!


Ramblings - Plus Recipe: Cream of Broccoli Soup

First, a wee bit of rambling, k? (Gotta live-up to the blog's name, right?!)

For those of you who live in remote caves in the Himalayas, or East Bumf**k, or wherever...  While the rest of the country has been digging out from record snowfalls and shivering their way through Polar Vortexes and/or whatever-the-heck kinda Plagues and Pestilence wrought by the Apocalypse of 2014... California is having, like, one of the driest, mildest winters of all time.  It's been so dry and pleasant, in fact, that I not only opened the TiKi BaR in January, but I've spent SEVERAL pleasant afternoons (wearing shorts 'n tank top 'n flip-flops, thankyewverymuch), while savoring Frosty Adult Beverages and generally gloating on Facebook (haven't yet confirmed just how many East Coasters have un-friended me!)

Nevertheless, the lack of rain (and, more specifically, lack of snowfall in the Sierras) is more-than troubling.  I vaguely remember living through imposed water-restrictions (No washing of cars, no watering of lawns, "sharing" flushes, etc.) when I was a kid, and it wasn't fun.  And it really looks like we may be headed down that path, again.  This is particularly troubling with our rather-large (by urban-standards) 1/4 acre lot.  We've got the pool, and lawns, and landscaping and :::GASP::: my GARDEN to worry about.  And I have no idea what the penalties are - for exceeding your monthly water allotments (but I bet hubs'll let me know - QUITE clearly - whenever we exceed them!).

So I have decided to take at least one of my raised beds "out of rotation" for the upcoming summer growing season.  Last year's tomato-harvest was suck-tastic (to say the least), so it's probably just as well.  Indie-Farms (aka Finnyknits) sez I need a "Crop Rotation Plan" so I'll use that as further justification to leave at least one bed fallow, this year...

I'm going to dial-back my tomato plantings significantly this year - and I'll only grow 'maters in my Grow-Boxes *** (self-watering patio planters that I had surprisingly good success with, last year).  I'll probably plant squashes in my raised beds (I'm pretty sure those aren't the same "family" as tomatoes and peppers).  And my Grow-Box/Planters will get fresh soil and will house a few "select" varieties of tomatoes (you have NO idea how difficult it is for me to narrow-down my choices!  It's like a disease or somethin'!).

Anyway, I'll post more about that later...  I thought I might start my seedlings this weekend (WAY fewer than last year, k?!), but it didn't happen.  Stay tuned for updates!

*** Note: I've decided to "pimp myself" on Amazon, since I post so many links to them (because I buy so damned much from them!) (Srsly, there's no sense in sorting my VISA transactions alphabetically 'cause they're all "Amazon!").  Anyhooo, if you click on my Amazon Links, I may get a wee bit o' spliff (although, please bear with me while I work out the kinks!).  Certainly not enough to retire to my own Private Island in the Caribbean - but I'll gladly accept a teensy commission.  Please don't consider me a sell-out, k? (Hell, my traffic #'s are so low, it's almost laughable)  Honestly, I only post links for products that I use (and can vouch for) myself (and have probably purchased from Amazon already)!

Okay.......  Enough "Rambling" - let's get to today's RECIPE, shall we?!

Oh yeah!  The reason I started rambling about weather was because we are FINALLY getting a glimpse of winter - Yay! (I had to wash TWO cars and water my Patio Plants - twice, even - to make it happen!).  Yep.  We've had, like, THREE WHOLE DAYS OF RAIN and rainy, cloudy days call for Hot, Stick-To-Your-Ribs kinda meals. I've been making pot roasts and GALLONS of soups.  Which brings me to today's recipe - which was Ahhh-MAZINGLY delicious! (as evidenced by the fact that Hubs snarfed it ALL down before I could even *think* about freezing it!) (Frankly, I consider myself lucky to have gotten a couple of small bowls out of it!)


QT's Cream of Broccoli Soup (Hubs-Approved, even!)
Yield: I honestly don't remember, but it was WAY MORE than 2 ppl could eat in one sitting!

Ingredients:

  • 4 cups fresh broccoli florets
  • 6 green onions (reserve green tops for garnish)
  • 1 medium shallot (optional)
  • 3 stalks celery
  • 32 oz carton of chicken (or veggie) stock
  • 2 cups shredded cheddar cheese (I used a "Mexican Blend" of jack+mild cheddar+queso+asadero)
  • 1-2 T butter
  • 1-2 T extra virgin olive oil
  • 1 C Crema Casera (or Creme Fraiche)*
  • Seasoning salt, to taste**
Instructions:

  1. Chop broccoli into bite-sized pieces (cooks faster that way).  You can also add some of the broccoli stalks, if you like - just make sure you chop 'em into very small chunks
  2. Chop the white part of the onions and (optional) shallot into small chunks
  3. Chop celery into small chunks
  4. Start by melting butter w/olive oil in large soup pot (I used my 4.25 qt dutch oven)
  5. Dump in onions, shallots and celery.  Saute til limp and translucent
  6. Add broccoli and stir around in the oil for about a minute
  7. Add Chicken Stock, bring to a boil - stirring constantly
  8. Reduce heat and let it simmer for appx 30 mins
  9. Hit it, lightly, with an immersion blender to break-up the bigger chunks.  You can puree it as much as you like.  I like it kinda lumpy!
  10. Return to low heat and stir in shredded cheese and cream. 
  11. Garnish with chopped green onions and serve immediately.  Deeeeee-lish!

*From what I can gather, Crema Casera and Creme Fraiche are almost the same thing.  I've never had the latter, so I can't confirm.  In any event, by using Crema Casera (which is pretty easy to find here in San Jose!), I didn't need any thickeners.  If you can't purchase Crema Casera or Creme Fraiche, you can substitute heavy cream + sour cream (I'm guesstimating 3/4 c cream to 1/4 c sour cream), or just use half-and-half.  You might need to add a thickening agent (roux of butter + flour, or water + corn starch, or potato starch)
**I used Goya Adobo with Pepper Seasoning.  I think this might be an East Coast thing because friend, Joysey K, sent me a jar after she raved about it (I concur - it's AWESOME!).  Luckily, Amazon's got it, too.  I suspect I'll be needing more, very soon!

Amazon Affiliate Link (Thanks for your support!)


Monday, January 27, 2014

Recipe: Sweet Potato Leek Soup

If you hang out here on a semi-regular basis, you probably know that I'm a bit of a nutcase when it comes to wanting to know where my food comes from.  Part of it comes from watching all those funky Food documentaries on Netflix (Food, Inc., King Corn, Frankensteer, etc.), and part of it is probably hereditary (my mom grew up on a farm, and my dad and I spent a couple of years "Playing Farmer" on her old homestead in Utah, after we'd inherited it from Grandpa).

And if you happen to know ME in the real world, you'll know I don't "Do" resolutions.

Howsomever...  The two don't have to be mutually exclusive.  I mean, we did buy Spreckles, the Fair Pig, a couple of years ago (and we've still got some pork chops and ribs in the freezer!).  And I do subscribe to Farm Fresh To You - where I get a monthly delivery of fresh organic produce (used to be weekly, but we just couldn't eat through THAT much produce!).

Now, I recently discovered that one of our local Farmer's Markets is actually open year-round (Yay!), so that brings me to my NON-Resolution for 2014:  Wherever possible, I am going to refrain from buying produce at the grocery store (in spite of the fact that, yes, they do have a decent selection of organics).  Instead, I am going to make an effort to :::GASP::: "Plan-ahead" and buy all of my produce at the Farmer's Market.

I might even take it a step further and try to convince myself to actually WALK to the Farmer's Market - but that's more of a long-range goal (since I've only recently regained the ability to walk!).

So anyhoooo...  My stash of sweet potatoes from the Farm-Share delivery was getting a bit overwhelming.  I also had a couple of leeks that were threatening to get mushy. I know I like Potato-Leek Soup - but potatoes don't exactly love me (carbs, ya know?). Sweet potatoes, surprisingly, are lower in net carbs and also lower on the glycemic index. And, frankly, I think sweet 'taters taste better.  So I decided to Google "Sweet Potato Leek Soup" and found this recipe.

But also in the course of my Googling, I discovered that MyRecipes.com has a feature where you can key in all sort of different ingredients and it'll come back with some recipe ideas.  So I tried various combinations of ingredients (including cauliflower and corn) and ended up finding this recipe.

So those two recipes were kind of my starting point for today's creation...


Mmmm! Soup!

QT's Sweet Potato Leek Soup
Yields - appx 6 generous servings

Ingredients
  • 2 leeks
  • 2 ribs celery
  • appx 1-1/2 lbs small sweet potatoes (in my case, appx 11 small spuds)
  • 1 shallot (optional - I had it on-hand)
  • 1/2 head cauliflower
  • 32 oz chicken (or vegetable) stock
  • 2-3 cups corn kernels (I used frozen)
  • 1/2 cup heavy cream
  • 1/4 cup sour cream
  • 1/4 cup cooking sherry
  • appx 2 TBS Extra Virgin olive oil (I used garlic-infused EVOO)
  • garlic sea salt
  • white pepper
  • Seasoning Salt (whatever brand you happen to like)
  • 1/4 tsp cardamom
  • 1/4 tsp curry powder
  • dash of smoked paprika
Instructions
  1. Wash and slice the white and light-green parts of your leeks into small "rounds."  I liked the first recipe's suggestion to use the salad spinner for cleaning the leeks after they are sliced (MUCH easier!).  Finely chop your celery and shallot. Coarsely chop your cauliflower.
  2. Heat the olive oil in a large soup pot (I used my 4.25 qt dutch oven), then add the chopped veggies. Saute lightly on medium heat 'til limp and translucent (the cauliflower won't go limp, but it will begin to soften).  Do not brown your veggies - you just want 'em soft.
  3. Peel and slice your sweet potatoes into "coins" while the veggies are limpifying.  Then add the sweet taters to the pot and saute them lightly.
  4. Pour the chicken (or veggie) stock into the pot.  Bring to a boil then reduce heat to simmer.  Cover and let it blorp for awhile.  I think it took roughly 30-45 minutes for the taters and cauliflower to get truly mushy - but that's what you're going for...
  5. Turn off the heat and let it cool just a bit.  Then grab your immersion blender and puree the soup until smooth (that's an optional step).
  6. Return the pot to the stove and dump in your frozen corn (mine was frozen solid, so I dumped a sizeable chunk into the pot!).  Cook on medium low 'til the corn is heated.
  7. Add the cream, sour cream and cooking sherry.
  8. Give it a taste and decide what seasonings it needs.  I used my garlic sea-salt grinder and a combination of Lawry's Seasoning Salt (should be available at any grocery store) and Andersen's Seasoning (which is probably just a California Thing - I bought it at Pea Soup Andersen's Restaurant and have not been able to find it online).  It was still a bit bland so I added some white pepper.  Then a large pinch of cardamom (which gave it a bit of a "high note") and a smaller pinch of curry powder.
  9. Serve with a dash of paprika for color
Sweet Potato "coins" getting ready to dive into the hot tub!

Overall, it's a very mild (spice-wise) soup, but quite thick and hearty.  And I expect it should freeze well - but I didn't end up with 15-gallons like I normally do!

It really was quite tasty - and definitely worth making again.

Cheers!

Saturday, January 18, 2014

Hooch Update...

...Such as it is!

And WARNING: This *may* be a bit rambly, k?!

So, admittedly, I have a tendency to go off half-cocked sometimes.  And this Hard Cider Experiment definitely falls under the heading of "Maybe you should've thought this through, first!"

Nevertheless - I figure I can always serve as a Bad Example, right?!

So I started posting my "recipe" last week.  And it was loosely-based on a recipe that I found online.  And I went all Gangbusters on it by purchasing a glass carboy and airlock and assorted ingredients, and combining everything in a kind of haphazard fashion, and - Miracle of Miracles - it behaved the way it was supposed to!  It started fermenting and bubbling and whatnot - Yay!

Well, after my initial throwing-together-of-stuff, I read thru the intertubes a little further and started second-guessing myself.  End result being: "Hmm. Maybe I should've used more sweetener.  Oh well!"

So the brew has been burbling most-happily all week long and yesterday, I noticed the burbling started to slow down (and, as of this morning, it had mostly stopped!).  In other words, fermentation was pretty-much complete.  But the contents of the jug were still *quite* opaque and I figured it needed to be transferred into another container at this point - and allowed to rest for awhile so the sediment would settle - but I really wasn't sure.

Now, I absolutely ABHOR shopping (I know - weird huh?!), so most of my acquisitions arrive via Big Brown Truck - courtesy of Amazon.  But I found a [somewhat] local Brewery Supply store up in north San Jose: Beer and Wine Makers of America.  I purchased my 3 gallon carboy there and was really impressed with the owner of the shop and how knowledgeable and helpful he was.  Last weekend, there were quite a few people in his (teeny tiny) shop, asking lots and lots of questions.  I was more of an "I know what I want so I'll get out of your hair" kinda customer - last weekend!

I made another trek out there, yesterday afternoon.  Thankfully, I was the only customer, so when he asked if he could help me I was all "Yeah, I bought a 3 gallon carboy from you, last weekend, to make a Hard Cider/Meady/Apple Cyser Brew and it's been bubbling quite merrily all week long.  But now the bubbling has stopped and I think it's time for me to do something else.  What's next?"

Well sh*t-howdy if he didn't tell me!  I pelted him with dozens of questions - including expressing my apprehension about not using enough sweetener. "How much did you use?" "2 lbs of honey per gallon of water, plus about half-a-gallon of cider" to which he agreed "Yeah. Your cider's gonna be bone dry." (Oops).  Also - there's not much I can do about it now, but he said I can add honey when I serve it.

(But for future Cysers, he suggested doubling the quantity of honey to 4 lbs. per gallon)

I expressed a desire for it to be sweeter and carbonated.  Apparently 'sweeter' isn't likely to happen at this stage of the game (apparently adding more honey will kick-start another fermentation which, I gathered, was not a good thing).  But I can increase the carbonation by adding corn sugar at a rate of up to 1 cup per gallon...

He also shared a few other helpful hints (that I can't recall, offhand), but the general gist I came away  with was:  Seems like Hard-Cider was probably a good choice for my first attempt at brewing.  Evidently it's pretty difficult to f**k-up hard cider - whereas, with beer, there's apparently a million-and-one things you can do to f**k that up.  So "Yay Me" for starting with hard cider, right?!

Okay.  So enough yammering.  What's going on with the Mad Scientist Experiment???

Well, I was right about needing to do something when the burbling stopped.  It's now time for a secondary fermentation.  I held onto the round glass bottle that the Martinelli's Cider came in, and I also picked up two more 1-gallon glass jugs at the brew shop.  I also picked up a couple more airlocks and a siphon (and bunch of other sh*t because I think I'm gonna attempt ***GASP*** Beer-Brewing, next!).

So today I sanitized everything.  Then I took another hydrometer reading:

I must shamefully admit that I have NO idea what this means (YET!)

Then I sanitized everything and siphoned the brew out of the 3-gallon carboy, and into 2 x 1 gallon jugs and 1 x 1/2 gallon (appx) jug.  And I think (but I'm not sure) that's called "racking."  Anyway, we are going into "2-stage fermentation" (I'm pretty-sure that's correct!) (I really need to read Hub's book on brewing - if only so I can sound somewhat-intelligent!!!)

I discovered that the whole "siphoning" chore is actually a 2-person task (just to get it started, anyway).  Thankfully, the beer-making kit has a wand-thingie that shuts-off the siphon if it's not pressed against the 'receiving' bottle.  So anyway, I siphoned-off most of the brew - being careful not to stir-up the yeasty sediment (yeasty stuff was about 1" deep, on the bottom of the carboy).

Hey - at least it's a pretty color, right?!!

I did sample a taste of it (poured the test-brew from the test-tube into a glass) and Hoo-Boy!  Yes, it is DRY!  (I suspect I'll be drinking "spritzers" with 7-Up!).

I did mix-up 1 cup of corn sugar (from the brew-shop) with 1 cup of bottled-water + a splooge of honey.  I divided the add'l sweetener "somewhat equally" into the secondary containers.  Then I popped airlocks on the top and we'll see what happens (presumably, the additional sweetener will increase carbonation - but not sweetness).

Now we let it set for a few more weeks.  No clue what's gonna happen next, but This Is An Adventure, right?!!!

(Yeah. Whatever!!!)

So there is an update on my latest Wild Hair...  More to follow, I'm sure.

(including a future attempt at beer-making.  I bought Hubs a beer-making kit a couple of Christmases ago - but it's been sitting in the box ever since.  I've used some of the beer-making components for my Cyser, but I picked up actual beer-ingredients yesterday so I may attempt that in the not-too-distant future).


Monday, January 13, 2014

Fermentation is Happening!

I have no clue if this is gonna work, but here goes:


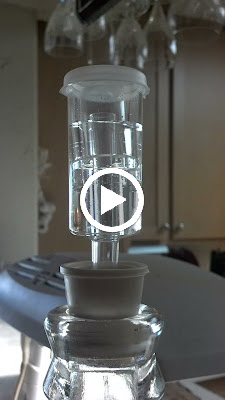
Why yes, it *is* rather like watching paint dry!

Nevertheless, I'm excited 'cause it means my concoction is fermenting so "Yay Me!"


Sunday, January 12, 2014

Zombie Killers! (Recipe: Cherry Apple Cyser)

Yesterday we had some business to attend to in Gilroy, and on the way back, Hubs announced that he was hungry so "Let's grab some lunch."  Morgan Hill is kinda/sorta 'on the way' so I squealed "TRAIL DUST!"  which is my absolute most-favorite BBQ Joint in the Greater Bay Area.  Their BBQ is the Real Deal (and you can smell 'em from a block away!).  Orgasmically delicious food!

Their menu is pretty limited, but their Beer Menu is incredible and we usually need at least 10-15 minutes to decide what we're gonna drink.  Well yesterday I tried something new: B. Nektar Zombie Killer Cherry Cyser.  It's kind of a cross between a hard-cider and a mead.  Pretty sweet and 100% delicious!

Zombie Killer!

My initial* Google Searches led me to believe that it couldn't be purchased around here, so I found it odd that Trail Dust served it.  But it was sooooo good, I decided I'd attempt to make it myself!

(*subsequent Googling revealed that it is carried at a handful of liquor stores in the area - Yay! Might have to seek it out - if only for comparison purposes)

So then I asked Google to tell me what the hell a Cyser was.  I figured it must be similar to mead (it is quite sweet, and lightly carbonated), and Google told me that yes, in fact, it *is* like a mead, in that it is basically a hard-cider made with honey (whereas mead is simply wine made from honey - Learn something new every day, right?!).  Google further told me that it was comparatively easy to make (Yay Google!).

Here is where Google sent me.  And here is another really, really good page.

I snooped through a couple-three additional sites and finally decided that the best way to tackle this was to simply DO IT.  Hubs has some beer-making equipment but, unfortunately, very little would be usable for my first attempt at brewing.  So I hit the local Brewery Supply in downtown SanJo.  Picked up a 3 gallon glass carboy, an airlock, and some Mead Yeast (and nutrient/booster stuff for the yeast). Then, a quick trip to the health-food store around the corner to procure local and/or organic ingredients.

Organic tart cherry concentrate
Raw, unfiltered local honey
Martinelli's apple juice
Shiny new carboy in the back

Now, before we go much further, let me start with the requisite disclaimer that I truly don't know what the hell I'm doing (and may well be doing it all WRONG!).  So if you decide you want to try this recipe, I make absolutely NO guarantees of success - k?!  Feel free to consult Google yourself or - better still - maybe read a book on the subject (I skipped that step!).  This is simply what *I* did.  I'm hoping I'll have results in approximately one-month and MAYBE I'll even post an update in a semi-timely fashion (UNLIKE my Limoncello Adventures!).

Okay?  Ohhh-KAY!  Here goes:

QT's Interpretation of a Cherry-Apple Cyser
Yield - almost 3 gallons, I bet'cha!

Ingredients
  • 2 gallons distilled water
  • 4 lbs local raw honey
  • 64 oz organic apple juice (no additives or preservatives)
  • 10 TBS organic tart cherry juice concentrate (bought it at the Health Food Store)
  • 1/2 tube of mead yeast (from the brewery supply) 
  • 2 tsp yeast nutrient (also from the brew-shop)
  • 1 tsp DAP (yep, brew shop)
First, take your yeast out of the fridge and let it reach room temperature.

Next, sterilize EVERYTHING that will come in contact with the brew.  Hubs had some sterilizer in his beer-brewing stuff (some kinda "no-rinse" variety that just needed to be mixed with warm water and swished around a bit) (I *did* end up rinsing it).  I used a 3-gallon glass carboy.

Then you'll want to mix the honey with the water.  I ended up doing this in batches, on the stove, in my enamelware pot (you'll want to use a non-reactive pot, I'm pretty-sure!).  I mixed appx 1/2 gallon of warm water with 2# of honey on low heat (just enough to make sure that the honey is well mixed), then pour into your carboy.  Do it again.  Try not to drip honey all over EVERY SQUARE INCH of your kitchen (Yeah, good luck with that!)

Then add your juices to the jug.  Notes on the juices: you can certainly tweak-around with the ratios and you may not be able to find "cherry concentrate" (honestly, I would have preferred Tart Cherry JUICE, but dealt with what I was able to find at the health food store).  I think the main thing here is making sure that the juices do not have any additives (i.e. citric acid/vitamin C or preservatives).  I suspect that additives/preservatives will impede fermentation (but, again, I have NO CLUE!)

Next, mix your yeast and the boosters/nutrients/yada-yadas according to package directions.  Unfortunately, my packages did NOT have directions, so I just stirred them into 2 cups of lukewarm water and stirred the hell out of it  Dump that into the carboy as well.

Now the FUN part - try to make sure everything is well-mixed.  I ended up putting a regular cap on the top of the jug and kinda leaned/twirled it around 'til the color looked pretty uniform.

Next, I took a small sample of the juice mixture, plopped it in a tube and floated our hydrometer in it to get an initial reading (Note: I should have done this BEFORE adding the yeast + yeast booster/nutrients) (this is just the first "Oops" of many!).

It's slightly above the 60 mark.  I think it might be 1.08 "specific gravity"

This is something I'll have to research further, but the general gist is that you subtract your "after" reading from your "before" reading, and that tells you how much alcohol is in the final product.

Anywaaaaay...  Last thing you do is seal the carboy and install the airlock (Note: Fill the airlock to the fill-line - I just poured in a little bit of distilled water).  As fermentation begins, pressure will build in the carboy.  The airlock is essentially a one-way valve that will allow the excess pressure to escape without allowing bacteria to enter.

Now, I just need to sit back and wait.  The airlock should start showing bubbles after a few hours and in a few weeks' time, I should have some Apple-Cherry Cyser to sample.  Can't wait!!!

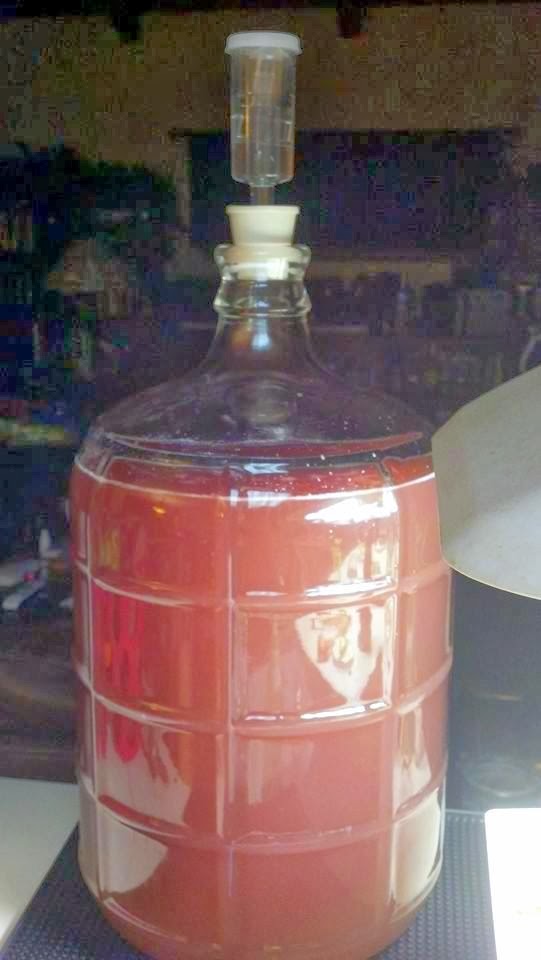
Sorry for the crappy Droid pic - but here it is!

The Cyser is brewing on the bar and is *quite* visible.  This one shouldn't take 4 years like the Limoncello did!

Stay tuned - I'll post an update when it's done!

Updates: I think I may pop back to this post, from time to time, and add updates as they relate to "starting" the wine.  I'll probably end up posting a "Final" recipe after everything is done.

1/13/14:  I've added a link to a super-good Mead site with different recipes/variants.  Also, forgot to mention that you need to add some kinda liquid to your airlock (fixed!).  Speaking of airlocks, I am happy to report that - as of this morning (day after starting this mess) - I'm seeing some bubbles, so that means that fermentation has begun - Yay!


I'm kinda scatterbrained! (Limoncello Recipe Follow-up - 2+ years late!)

A long time ago, in a galaxy far, far away...

I wrote this post.

And the original recipe (linked in the aforementioned post) said something about "the longer it ages, the smoother it gets."

Well, "out of sight, out of mind," as they say.  I put it in the back of the closet and promptly forgot about it!.  So the tequila-bottle full of lemon zest and 100-proof vodka has been aging in our closet for, ohhhhhh, a LONG time!  So it oughtta be REAL smooth, right?!

I forgot to snap a pic of it when I first extricated it from the closet, but it looked a lot like this:


Except the bottle was still full of yellow vodka, and the no-longer-yellow zest had all settled to the bottom.

Anyway, I pulled up the original website and followed the directions from there...  Filtered out the lemon zest, and then triple-filtered it with coffee filters.  Then I made up a batch of simple syrup (5 cups filtered water, 3-1/2 cups white sugar) (not gonna attempt a low-carb variant at this point).  Combined the syrup with the lemon-vodka.  Mixed well, then decided to pour it straight into my sterilized bottles (rather than hold it in a jug, then decant).

Now it looks something like this:


I ended up with two one-liter bottles (the swing-cap bottles that I found at IKEA), one 750 ml bottle (I reused a Captain Morgan bottle), and 1 eight-oz canning jar (not pictured) full of Limoncello.

Now I think it needs to age a bit more at this point.  The original website said 45 days, but I'll probably sneak a taste after a month.

Annnnnd...  I've moved the bottles into the den (which is a pretty-dark room most of the time) so HOPEFULLY I won't forget 'em!

I hope to post an update whenever I give it a taste - but I am pretty optimistic that it will be delicious!  It certainly smelled lemony (and the color is gorgeous!).

It will be an "occasional" treat (owing to the sugar-content), but I bet it will be wonderful in the summertime!

And my next "Wild Hair" Culinary Adventure may (or may not) be an attempt at making Apple Cyser - which is sort-of a cross between hard-cider and mead.  Had some with lunch, yesterday, and it was amazingly delicious - and Google leads me to believe that it's not too difficult to make!


View my page on Meet the Phlockers